
Why These Homemade Danish Pastries Are Worth Every Step
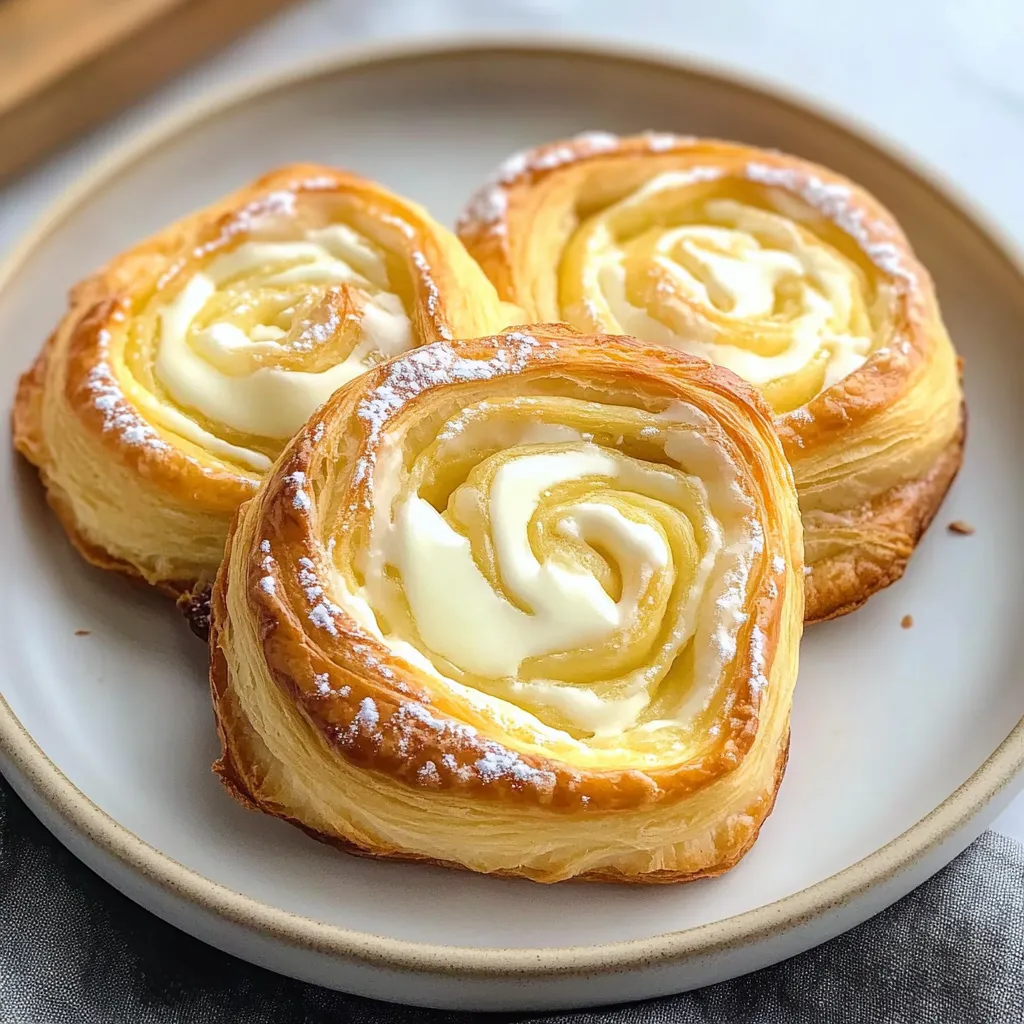
There’s something truly special about pulling a tray of golden, flaky Danish pastries out of the oven — the buttery aroma, the delicate layers, and that creamy, sweet filling melting slightly in the center. These Homemade Danish Pastries are one of those recipes that make you feel proud of every minute you spend in the kitchen.
I love how these turn out every time — the dough is soft yet crisp on the edges, and the cream cheese filling adds the perfect hint of tanginess. Whether you enjoy them plain, topped with fruit preserves, or finished with a drizzle of vanilla glaze, they’re an absolute treat for breakfast, brunch, or an afternoon indulgence.
This recipe might look a little long, but once you start laminating the dough, you’ll find it’s more meditative than difficult. And when you take that first bite of a warm, freshly baked Danish, you’ll understand exactly why it’s worth the effort.
Ingredients You’ll Need to Make the Perfect Danish Dough
Good Danish pastry starts with quality ingredients — simple pantry staples that come together through careful technique.
For the Dough:
- 4 cups (500g) all-purpose flour
- 1/3 cup (75g) granulated sugar
- 1 teaspoon salt
- 1 tablespoon (10g) active dry yeast
- 1 cup (240ml) whole milk, warm
- 1 large egg, room temperature
For Laminating:
- 1 cup + 2 tablespoons (250g) cold unsalted butter
For the Filling:
- 7 oz (200g) cream cheese, softened
- 1/4 cup (50g) granulated sugar
- 1 teaspoon vanilla extract
- Zest of 1 lemon (optional)
For the Glaze:
- 1 cup (100g) powdered sugar
- 1–2 tablespoons milk or lemon juice
- 1/2 teaspoon vanilla extract
Optional Toppings:
- Fruit preserves, fresh berries, or sliced almonds
Each component plays its part — the dough provides flaky layers, the filling adds creamy sweetness, and the glaze ties everything together with a glossy finish.
How to Make the Dough – A Buttery, Flaky Foundation
In a large mixing bowl, whisk together the flour, sugar, and salt. In a separate bowl, mix the warm milk with the yeast and let it sit for about 5–10 minutes until foamy — this tells you the yeast is alive and ready to work.
Add the egg and yeast mixture to the dry ingredients and stir until a dough forms. Knead until smooth and elastic; you’ll notice it becoming less sticky as the gluten develops. Once it’s ready, cover it and let it rest in the fridge for about 30 minutes. This helps the dough relax before laminating with butter.
Laminating the Dough – Building the Layers
This is where the magic happens. Place your cold butter between two sheets of parchment paper and pound it into an 8-inch square using a rolling pin. The butter should be firm but pliable — not melting, but soft enough to shape.
Roll your chilled dough into a 16-inch square, then place the butter block in the center like a diamond. Fold the dough corners over the butter to seal it inside. Roll the dough into a long rectangle, then fold it into thirds, like folding a letter. Chill for 30 minutes to keep the butter firm.
Repeat this rolling and folding process two more times, chilling between each turn. These folds create the beautiful layers that puff up when baked. You’ll notice the dough becoming smoother and more elastic each time — that’s a good sign.
Shaping and Filling the Pastries
Once your dough has been laminated and chilled, roll it out to about ¼-inch thickness. Cut it into 4-inch squares.
In a small bowl, prepare the filling by beating together the softened cream cheese, sugar, vanilla, and lemon zest until creamy and smooth. Place a tablespoon of this filling in the center of each square.
Now, you can get creative with shaping — fold opposite corners toward the center for a classic Danish shape, twist the edges for a pinwheel look, or simply leave them open for a rustic style. Add a small spoonful of fruit preserves or a few fresh berries on top of the filling if you’d like.
Proofing and Baking for That Perfect Golden Finish
Arrange the shaped pastries on parchment-lined baking sheets, leaving some space between them. Cover loosely with a clean kitchen towel and let them rise for about 1 hour, or until puffy and slightly soft to the touch.
Preheat your oven to 390°F (200°C). Before baking, brush each pastry with a little milk or egg wash for a golden sheen. Bake for 15–20 minutes, or until they’re beautifully golden brown and the centers look set.
The smell at this point is unbelievable — buttery, sweet, and warm. I always find myself peeking through the oven door just to watch the layers puff up.
Making the Sweet Glaze
While the pastries cool, whisk together powdered sugar, milk or lemon juice, and vanilla extract to make a smooth glaze. Adjust the consistency with more liquid if needed — it should be thick but pourable.
Once the pastries have cooled completely, drizzle the glaze over the tops in thin ribbons. If you like, sprinkle sliced almonds or powdered sugar for an extra touch of elegance.
Serving Ideas – Enjoying Your Homemade Danish
These Danish pastries are best enjoyed the day they’re baked, slightly warm with the glaze just set. Serve them alongside a cup of coffee or tea for a cozy breakfast or brunch.
If you’re hosting, arrange them on a platter with different toppings — some with berries, some with apricot jam, others plain with glaze. It makes for a beautiful and inviting spread.
I love how versatile this dough is — you can also fill it with Nutella, almond paste, or custard. Once you’ve tried this method, you’ll start dreaming up endless variations.
Tips for Success – From My Kitchen to Yours
- Keep everything cold: This is the key to flaky layers. If your butter starts to soften too much, pop the dough back into the fridge for 10–15 minutes.
- Don’t rush the resting times: Chilling between folds is what makes the pastry light and layered.
- Use real butter: Margarine won’t give the same flavor or texture.
- Let them cool before glazing: Otherwise, the glaze will melt right off.
Your Danish Pastry Questions, Answered
Can I make the dough ahead of time?
Yes! You can prepare the laminated dough a day in advance and keep it refrigerated overnight. Just roll, shape, and bake the next morning.
Why did my pastries not puff up?
That usually happens if the butter melted into the dough during rolling. Keep everything well-chilled and handle the dough quickly.
Can I freeze Danish pastries?
Absolutely. Freeze the shaped, unbaked pastries on a tray, then store them in a sealed bag. When ready to bake, let them thaw and rise before putting them in the oven.
What’s the best filling variation?
Cream cheese and jam are classic, but lemon curd, almond cream, or even chocolate-hazelnut spread are all amazing options.
How do I store leftovers?
Keep baked pastries in an airtight container at room temperature for up to 2 days. You can reheat them in a warm oven for a few minutes to restore their crispness.
Homemade Danish pastries may take a little time, but they reward you with something truly special — layers of buttery dough, creamy filling, and that perfect touch of sweetness. Once you’ve made them from scratch, you’ll never look at store-bought versions the same way again.
