
A Cozy Autumn Treat – The Charm of Pumpkin Buns
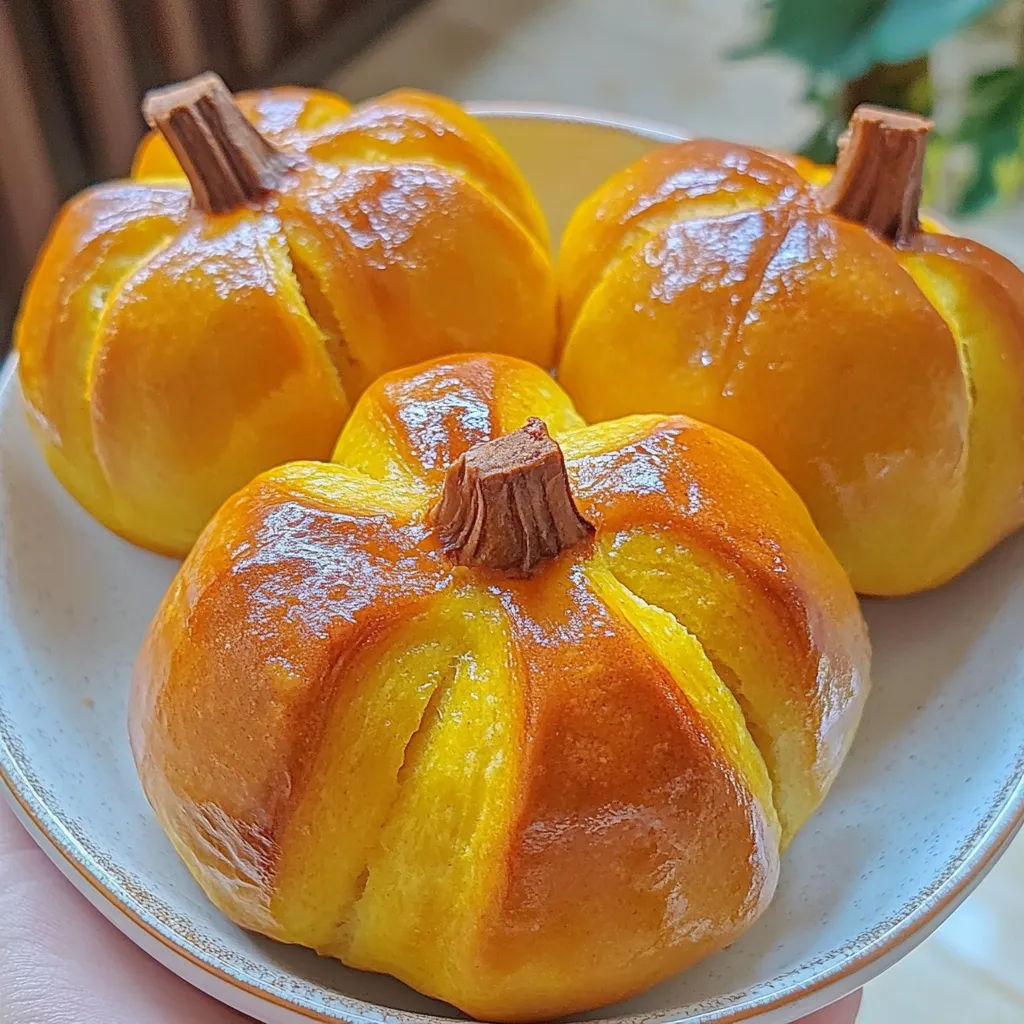
When the weather starts to cool and pumpkin spice fills the air, there’s nothing cozier than baking a batch of warm, golden pumpkin buns. These adorable, soft breads don’t just taste like fall—they look like it too, shaped into little pumpkins with cinnamon sticks as stems. I love making them on chilly weekends; the sweet aroma of pumpkin and butter drifting through the kitchen is pure comfort.
This recipe is simple but rewarding. The dough comes together easily, and the color from the pumpkin puree gives each bun a natural orange glow. Whether you serve them with a drizzle of honey, a pat of butter, or a warm cup of tea, they never fail to impress.
What You’ll Need for These Golden Pumpkin Buns
These buns use pantry staples and a bit of pumpkin puree for color, moisture, and flavor. The dough is enriched with milk and butter, which makes it extra soft and fluffy.
Ingredients:
- 3 cups bread flour
- 5 oz pumpkin puree
- ¾ cup warm milk
- ¼ cup butter, room temperature
- ½ tbsp instant dry yeast (about 5 g)
- ¼ cup granulated sugar
- ½ tsp salt (plus more for garnish)
- Cinnamon sticks for garnish
You can use canned pumpkin puree or homemade—it doesn’t matter as long as it’s smooth and not watery.
Getting Started – Mixing and Kneading the Dough
Start by combining warm milk and instant yeast in a large mixing bowl. Let it sit for a few minutes until the yeast begins to bloom and you see small bubbles form. This tells you the yeast is active and ready to work its magic.
Next, add the bread flour, pumpkin puree, sugar, and salt. Mix until the dough starts to come together. I prefer using my hands here; you can really feel when it transitions from shaggy to elastic.
Once the dough feels smooth, add the softened butter and knead again. At first, the butter might make the dough slippery, but keep kneading—it will absorb and create a silky, soft texture that’s slightly tacky but not sticky.
Proofing – Letting the Dough Rise to Perfection
Cover the bowl with plastic wrap or a clean kitchen towel and let the dough rest in a warm spot. It usually takes about 30 minutes to double in size, depending on your room temperature. When you poke it gently and the indentation stays, it’s ready for the next step.
Shaping the Pumpkin Buns – The Fun Part
Once the dough has risen, punch it down gently to release the air. Divide it into six equal portions and roll each one into a smooth ball.
Now comes the creative part—turning them into mini pumpkins. Using a long piece of thread or kitchen twine, tie it loosely around each dough ball to divide it into eight segments. Don’t pull too tight, as the dough needs room to expand while baking.
Set the shaped buns on a parchment-lined baking tray, giving them a bit of space to rise. Brush each one with milk to help them bake to a lovely golden color.
Baking to Soft, Buttery Perfection
Preheat your oven to 350°F (175°C). Bake the buns for about 20 minutes, or until they turn golden brown and your kitchen smells like sweet, baked pumpkin.
Once baked, remove them carefully from the oven. Gently cut and pull away the threads before they cool completely to avoid tearing the delicate surface.
While still warm, brush each bun with a thin layer of melted butter for a glossy finish and an extra touch of flavor.
Adding the Finishing Touch – The Cinnamon Stick Stem
To complete the pumpkin look, make a small hole in the center of each bun and insert a cinnamon stick. Not only does it look adorable, but it also adds a subtle spice aroma that pairs perfectly with the soft sweetness of the bread.
Serving and Enjoying Your Pumpkin Buns
Serve these buns warm with butter, honey, or even a light dusting of cinnamon sugar. They’re perfect for breakfast, brunch, or as a sweet side for a fall dinner. I love making them for Halloween or Thanksgiving—they look beautiful on the table and taste even better the next morning toasted with a bit of jam.
Store leftover buns in an airtight container for up to three days at room temperature. Reheat them for a few seconds in the microwave or a low oven to bring back that fresh-baked softness.
Variations and Fun Twists
- Stuffed Pumpkin Buns: Try filling them with cream cheese, Nutella, or sweet red bean paste before shaping.
- Whole Wheat Version: Substitute half of the bread flour with whole wheat flour for a heartier texture.
- Savory Pumpkin Buns: Skip the sugar and add shredded cheese or herbs for a savory take.
Each variation has its own charm, but the base recipe remains soft, golden, and unmistakably cozy.
Baking Tips for Success
- Make sure your milk is warm, not hot—too much heat can kill the yeast.
- Use a kitchen scale if you have one for even-sized buns.
- Don’t rush the proofing time; patience gives you fluffier bread.
- If the tops brown too quickly, cover lightly with foil in the last few minutes of baking.
Pumpkin Bun Q&A – Your Baking Questions Answered
Can I use all-purpose flour instead of bread flour?
Yes, but the texture will be slightly less chewy. Bread flour gives the best structure.
My dough feels too sticky. What should I do?
Add a little flour, one tablespoon at a time, until it’s easier to handle—but don’t overdo it or the buns will turn dense.
Can I make the dough ahead of time?
Absolutely. You can refrigerate it overnight after the first rise. Let it come to room temperature before shaping.
Why use thread to shape the pumpkins?
It’s the easiest way to create the pumpkin-like segments. Just remember not to tie too tightly.
How long do they stay soft?
They’re best fresh, but if stored properly, they stay soft for up to three days. A quick warm-up makes them as fluffy as new.
Homemade Pumpkin Buns are more than just bread—they’re a celebration of autumn warmth, creativity, and the simple joy of baking something beautiful from scratch. Once you try them, they’ll become a seasonal favorite you’ll look forward to every year.
