
A Beloved Southern Treat with Old-School Charm
Fried pies are one of those recipes that instantly feel familiar, even if you didn’t grow up eating them. They’re humble, hand-held, and deeply comforting. I still remember the first time I made them at home—the sound of the oil gently bubbling, the smell of buttery dough frying, and that moment when you crack one open and the filling steams slightly.
These pies have roots in home kitchens where nothing went to waste. Extra fruit, leftover sweet potatoes, or preserved fillings were tucked into simple dough and fried until golden. No fancy tools, no perfection required. Just good ingredients and a little patience.
Simple Ingredients That Do the Heavy Lifting
This is one of those recipes where the ingredient list looks almost too simple, but each item plays an important role. Cold fat for flakiness, salt for balance, and a filling that brings it all together.
Ingredients:
- 2 cups all-purpose flour
- 1/2 teaspoon salt
- 1/2 cup cold butter or shortening
- 1/2 cup cold water
- Oil for frying
- Filling of your choice (apple, peach, cherry, berry, or sweet potato)
- Optional: powdered sugar for dusting
Making the Dough the Old-Fashioned Way
Start by mixing the flour and salt in a large bowl. I like to whisk them together so the salt is evenly distributed before adding the fat. Cut in the cold butter or shortening using a pastry cutter or your fingertips until the mixture looks crumbly, with pea-sized bits throughout. Those little chunks are what create flaky layers later.
Slowly add the cold water, a little at a time, mixing gently just until a dough forms. Don’t overwork it—this isn’t bread dough. Once it comes together, cover it and let it rest for about 15 minutes. That short rest makes the dough easier to roll and keeps it from shrinking back.
Rolling, Filling, and Sealing Like a Pro
Roll the rested dough out on a lightly floured surface until it’s thin but not fragile. I aim for something close to pie crust thickness. Cut the dough into 4–6 inch circles; they don’t have to be perfect. Slightly uneven edges add charm.
Place 1–2 tablespoons of your chosen filling in the center of each circle. Be careful not to overfill—too much filling makes sealing difficult and can leak during frying. Fold the dough over to create a half-moon shape, then press the edges together with a fork to seal tightly.
Frying to Golden Perfection
Heat your oil to 350°F (175°C). If you don’t have a thermometer, drop in a small piece of dough—it should bubble immediately without browning too fast.
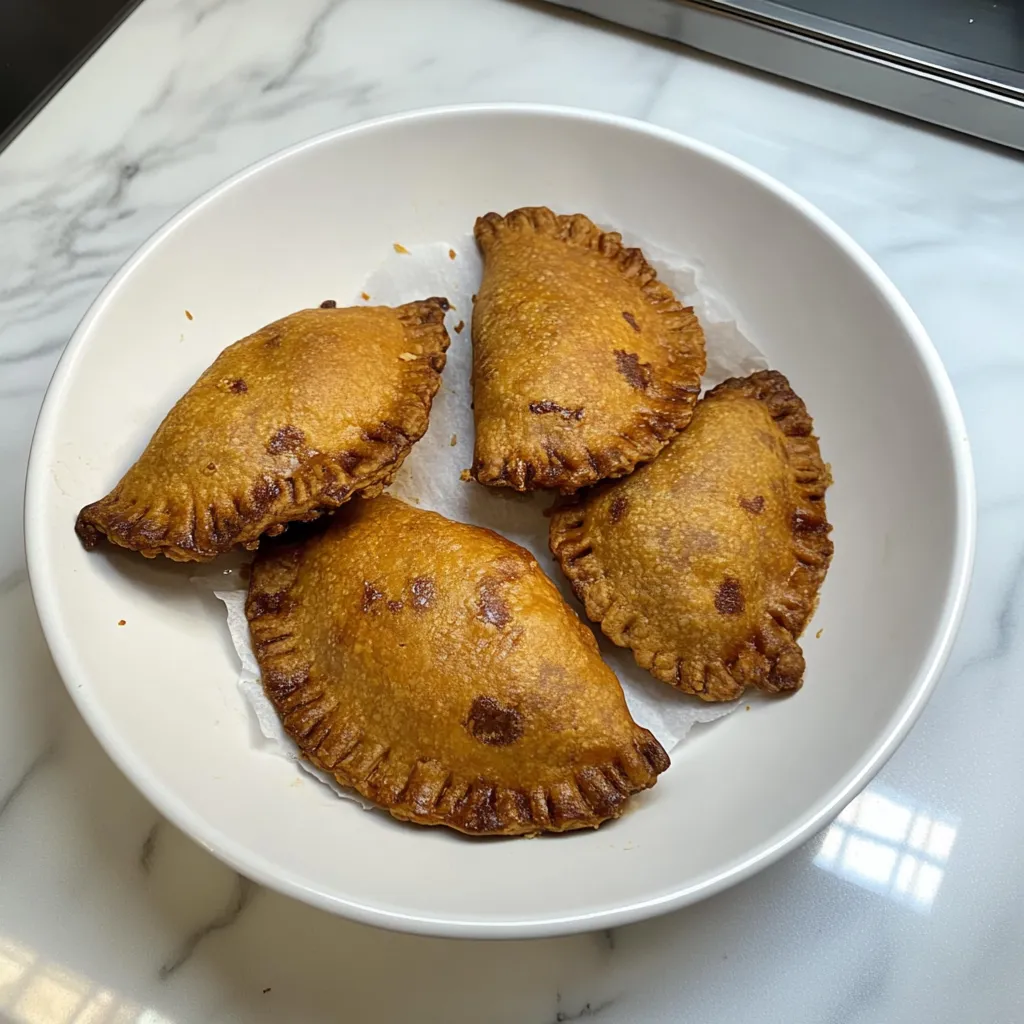
Carefully lower the pies into the hot oil, frying just a few at a time. Let them cook for about 2–3 minutes per side until deeply golden brown. You’ll notice the dough puff slightly and turn crisp. That’s when you know they’re ready.
Remove the pies and place them on paper towels to drain. The smell at this stage is irresistible, and it’s very hard not to sneak a bite too early.
Choosing the Best Filling for Fried Pies
Apple is a classic for a reason, but don’t stop there. Peach filling gives a soft, jammy center, while cherry or berry adds a bright tartness. Sweet potato filling creates a richer, almost custardy interior that feels especially nostalgic.
Whatever filling you use, make sure it’s thick and not overly wet. Runny fillings tend to burst through the dough and make frying messy.
Common Mistakes and How to Avoid Them
One of the biggest mistakes is overworking the dough, which leads to tough pies instead of tender ones. Another is oil that’s too hot or too cool—too hot burns the outside before the inside cooks, and too cool makes greasy pies.
Also, resist the urge to overcrowd the pan. Frying in small batches keeps the oil temperature steady and ensures even browning.
Serving, Storing, and Reheating Fried Pies
Fried pies are best enjoyed warm, shortly after frying. You can dust them with powdered sugar or leave them plain—they’re delicious either way.
If you have leftovers, store them in an airtight container at room temperature for a day or in the fridge for up to three days. Reheat them in a skillet or oven to bring back some crispness. The microwave works, but the crust will soften.
Easy Variations to Make Them Your Own
You can switch up the dough by using all butter for extra flavor or shortening for a slightly crispier texture. Try savory fillings too—sweet potato with warm spices or even lightly sweetened cream cheese paired with fruit.
For a baked version, brush the sealed pies with egg wash and bake at 375°F until golden, though I’ll admit the fried version has my heart.
Fried Pie Questions You Might Be Wondering About
Can I make the dough ahead of time?
Yes, you can refrigerate it for up to 24 hours. Let it sit at room temperature for a few minutes before rolling.
Why did my pies open while frying?
This usually happens if the edges weren’t sealed well or there was too much filling inside.
Can I freeze fried pies?
You can freeze them after frying and cooling. Reheat in the oven to restore crispness.
What oil is best for frying?
Neutral oils like vegetable, canola, or peanut oil work best and won’t overpower the flavor.
Fried pies aren’t about perfection. They’re about warmth, comfort, and that first bite when the crust cracks and the filling melts into the dough. Once you make them yourself, you’ll understand why this recipe has stuck around for generations.
