
A Sweet Taste of Nostalgia – The Story Behind Old Fashioned Orange Candy
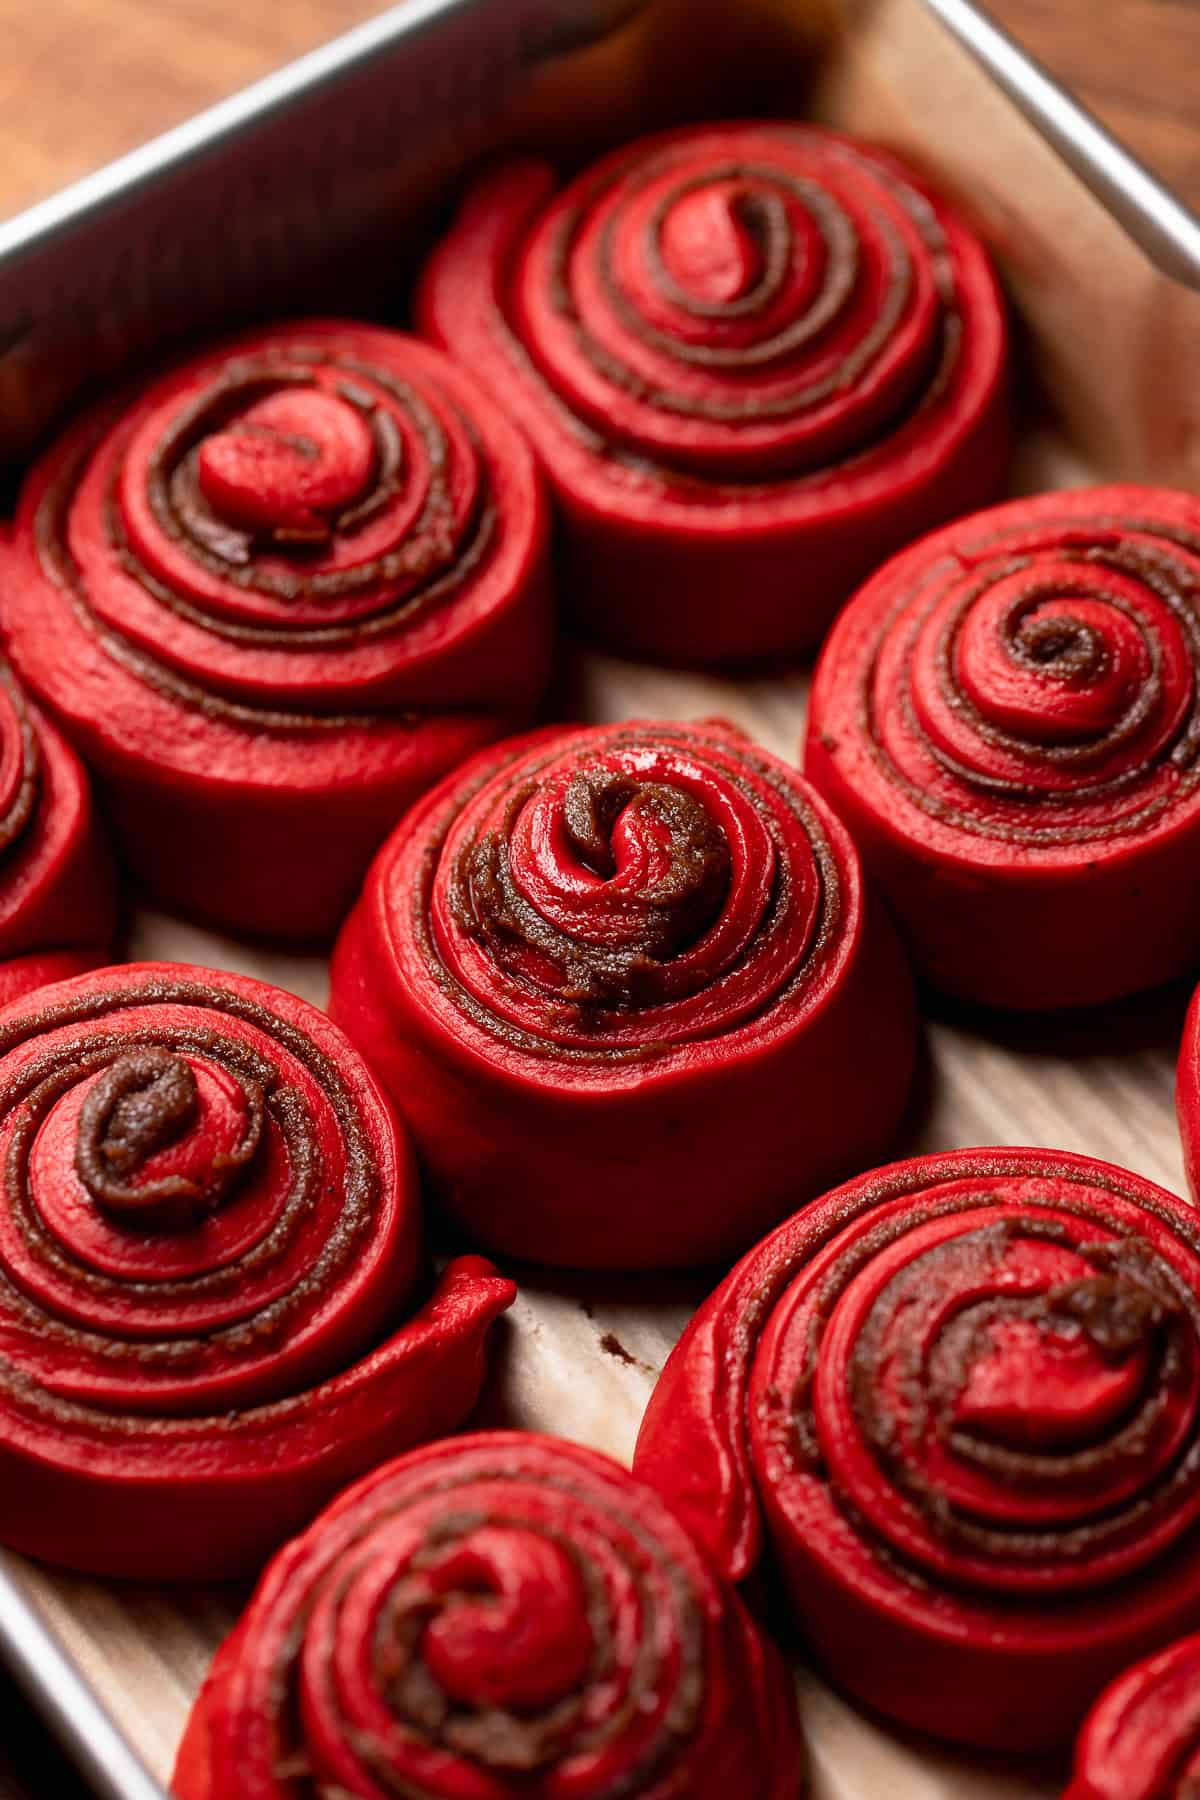
Red velvet desserts always feel a little special to me. There’s something about that deep red color mixed with cocoa and vanilla that instantly makes a recipe feel celebratory. These Red Velvet Chocolate Cinnamon Rolls are inspired by classic cinnamon rolls but with a rich, chocolatey twist and that unmistakable red velvet look.
The first time I made them, the kitchen smelled like warm cocoa, cinnamon, and butter all at once. It was impossible not to sneak a peek in the oven every few minutes. They came out soft, pillowy, and swirled with melted chocolate chips. I love how they feel both nostalgic and modern—like a holiday breakfast and a bakery treat rolled into one.
What You’ll Need to Make These Sparkling Citrus Treats
These rolls use simple baking ingredients, but the combination creates something truly indulgent. Here’s everything you need.
Ingredients
Dough:
- 1 cup warm milk
- 2 1/4 teaspoons yeast
- 1/3 cup melted butter
- 1/2 cup sugar
- 2 eggs
- 1 teaspoon salt
- 3 tablespoons unsweetened cocoa powder
- 1 to 2 tablespoons red food coloring
- 3 3/4 to 4 cups flour
For Baking:
- 1/2 cup heavy cream (to pour over rolls before baking)
Chocolate Cinnamon Filling:
- 1/2 cup softened butter
- 1 cup packed brown sugar
- 2 tablespoons ground cinnamon
- 1/2 cup mini semi-sweet chocolate chips
Cream Cheese Icing & Drizzle:
- 4 oz softened cream cheese
- 1/4 cup softened butter
- 1 cup powdered sugar
- 1 teaspoon vanilla
- 2 tablespoons heavy cream
- Optional: 1/4 cup melted chocolate
Preparing Your Oranges for Perfect Candying
Even though this recipe isn’t about oranges, preparation is just as important here. Start with the dough. Combine the warm milk and yeast in a large bowl and let it sit for about five minutes. You should see it get foamy on top—that’s how you know the yeast is alive and ready.
Add the melted butter, sugar, eggs, salt, and red food coloring. Whisk until everything is fully blended and the mixture turns a bold red color. This is one of my favorite moments because you can already imagine how beautiful the rolls will look once baked.
Crafting the Syrup – The Secret to a Glossy Finish
Now sift the cocoa powder into the flour. This step prevents clumps and gives the dough an even chocolate flavor. Add the flour mixture to the wet ingredients one cup at a time, stirring gently until just combined.
Let the dough rest for about five minutes before kneading. This short rest makes it easier to work with and improves the texture. Knead until smooth and stretchy, about 6 to 8 minutes by hand or 4 to 5 minutes with a mixer. The dough should feel soft and slightly tacky, but not sticky.
Simmer, Soak, and Sweeten – How to Candy Orange Slices Like a Pro
Place the dough into a lightly greased bowl and cover it. Let it rise for about one hour, or until doubled in size. I usually set mine near a warm window or on top of the oven while it preheats.
Once risen, roll the dough into a large rectangle on a greased surface. Mix the softened butter, brown sugar, and cinnamon, then spread it evenly over the dough. Sprinkle the mini chocolate chips across the filling so every bite gets a little melted chocolate surprise.
Roll the dough tightly from one long side into a log. Cut into 12 to 18 pieces and arrange them in a greased baking dish. Cover them while the oven preheats to 375°F.
Tips for Even Cooking and Preventing Bitterness
- Don’t overheat the milk. It should feel warm, not hot, or it can kill the yeast.
- Use gel food coloring for a deeper red color with less liquid.
- Roll the dough evenly so the rolls bake at the same rate.
- Watch closely while baking so the red dough doesn’t brown too much on top.
These small details really make the difference between good rolls and unforgettable ones.
Coating and Drying – Achieving That Signature Crystallized Crunch
Right before baking, pour the heavy cream over the rolls. This is the secret step that makes them unbelievably soft and gooey. The cream soaks into the dough as it bakes, creating a rich, tender texture that feels almost like bakery-style rolls.
Bake for 22 to 25 minutes. The tops should look set but still soft. The smell at this point is pure comfort—cocoa, cinnamon, and butter all mingling together.
Serving and Storing Your Homemade Orange Candy
While the rolls are still warm, beat together the cream cheese, butter, powdered sugar, vanilla, and heavy cream until smooth. Spread the icing generously over the rolls so it melts into every swirl. For a final touch, drizzle melted chocolate over the top if you like a little extra drama.
Serve them warm for the best experience. The centers are gooey, the edges are soft, and the icing melts into the chocolate filling. Store leftovers in an airtight container for up to three days at room temperature or five days in the fridge. Reheat gently before serving.
Creative Ways to Use Candied Oranges in Desserts and Gifts
These rolls are perfect for brunch, holidays, or special mornings. I love serving them with fresh berries and hot coffee. They also make a beautiful gift—wrap them in foil and deliver them warm to a friend or neighbor.
You can even turn them into dessert by adding a scoop of vanilla ice cream on the side. The warm rolls and cold ice cream together are incredible.
Variations to Try – From Lemon Slices to Chocolate-Dipped Twists
You can make these rolls even more fun by adding white chocolate chips to the filling or swapping cinnamon for a hint of espresso powder for a mocha flavor.
For a holiday version, add a pinch of nutmeg or peppermint extract to the icing. If you want less sweetness, skip the chocolate drizzle and let the cream cheese frosting shine on its own.
Nutrition Snapshot – Sweet Facts About This Classic Treat
These Red Velvet Chocolate Cinnamon Rolls are definitely a treat, but they’re homemade, which means no preservatives and full control over ingredients. Each roll provides energy from carbohydrates and fats, making them perfect for a special breakfast or celebration rather than an everyday snack.
Sweet Questions Answered – Your Orange Candy FAQ Corner
Can I make these rolls ahead of time?
Yes. Assemble the rolls, cover tightly, and refrigerate overnight. Let them come to room temperature before baking and adding the cream.
Why did my rolls turn brown instead of red?
Ovens vary. Try baking on the middle rack and tent loosely with foil if they brown too quickly.
Can I freeze them?
Yes. Freeze baked, unfrosted rolls for up to two months. Thaw and warm before icing.
Do I have to use food coloring?
You can skip it, but they won’t have the classic red velvet look. The flavor will still be delicious.
What makes them so gooey?
The heavy cream poured over the rolls before baking is the key. It creates a soft, rich texture that keeps them moist inside.
These Red Velvet Chocolate Cinnamon Rolls are one of those recipes that feel like a celebration every time you make them. From the vibrant color to the melted chocolate and creamy icing, they turn an ordinary morning into something memorable.
