
Why This Cherry Pie Brings Joy to the Kitchen
Few desserts capture the essence of summer like a homemade cherry pie. The sweet-tart flavor of fresh cherries combined with a buttery, flaky crust creates a dessert that’s as comforting as it is impressive. I love the moment the aroma of baked cherries and warm pastry fills the kitchen — it’s nostalgic, cozy, and utterly irresistible. This lattice-top pie adds a beautiful, handmade touch that always wows at the table.
Ingredients You’ll Need for a Perfect Cherry Pie
Making this pie requires simple pantry staples and fresh or frozen cherries. Choosing ripe, flavorful cherries really elevates the final dessert.
For the crust:
- 2 ½ cups all-purpose flour
- 1 cup (2 sticks) cold unsalted butter, cubed
- 1 teaspoon salt
- 1 tablespoon sugar
- 6–8 tablespoons ice water
For the cherry filling:
- 5 cups fresh or frozen cherries (pitted)
- 1 cup sugar
- ¼ cup cornstarch
- 1 tablespoon lemon juice
- 1 teaspoon vanilla extract
- Pinch of salt
For brushing:
- 1 egg (for egg wash)
- 1 tablespoon sugar (for sprinkling)
Crafting the Perfect Pie Crust
Start by combining flour, sugar, and salt in a large bowl. Cut in the cold butter until the mixture resembles coarse crumbs. Adding ice water, a tablespoon at a time, bring the dough together just until it forms. Divide into two discs, wrap, and chill for at least an hour.
The chilling step is key — it allows the butter to firm up and helps the crust stay flaky. I like to prepare the crust ahead of time so it’s easier to handle when rolling.
Preparing the Cherry Filling
In a medium pot, combine cherries, sugar, cornstarch, lemon juice, vanilla, and a pinch of salt. Cook over medium heat, stirring constantly, until the mixture thickens and becomes glossy. Let it cool completely before filling the pie.
Cooking the filling beforehand ensures it sets properly and prevents a runny pie. The aroma of sweet cherries with lemon and vanilla is irresistible while it simmers.
Rolling Out the Dough and Filling the Pie
Roll one dough disc into a circle and gently fit it into your pie dish, trimming the edges neatly. Pour the cooled cherry filling into the crust. Take your time here — making sure the filling is evenly distributed and doesn’t spill over will make your pie look neat and professional.
Creating the Lattice Top
Roll out the second dough disc and cut into strips. Weave them carefully into a lattice over the cherry filling. Seal and crimp the edges to prevent leaks during baking.
The lattice not only looks beautiful but also allows steam to escape, keeping the filling thick and luscious. I love the hands-on process of weaving — it feels so satisfying and adds a homemade charm.
Baking Your Cherry Pie to Golden Perfection
Brush the lattice top with egg wash and sprinkle with sugar. Bake at 400°F (200°C) for 20 minutes, then reduce the heat to 350°F (175°C) and bake for another 30–35 minutes until golden and bubbly.
Keep an eye on the crust; it should turn a deep golden brown while the filling bubbles up through the lattice. The first smell of baking cherries always makes my kitchen feel warm and inviting.
Cooling and Serving Tips
Allow the pie to cool at least two hours so the filling sets fully. Serve warm slices with vanilla ice cream or a dollop of whipped cream for a classic combination.
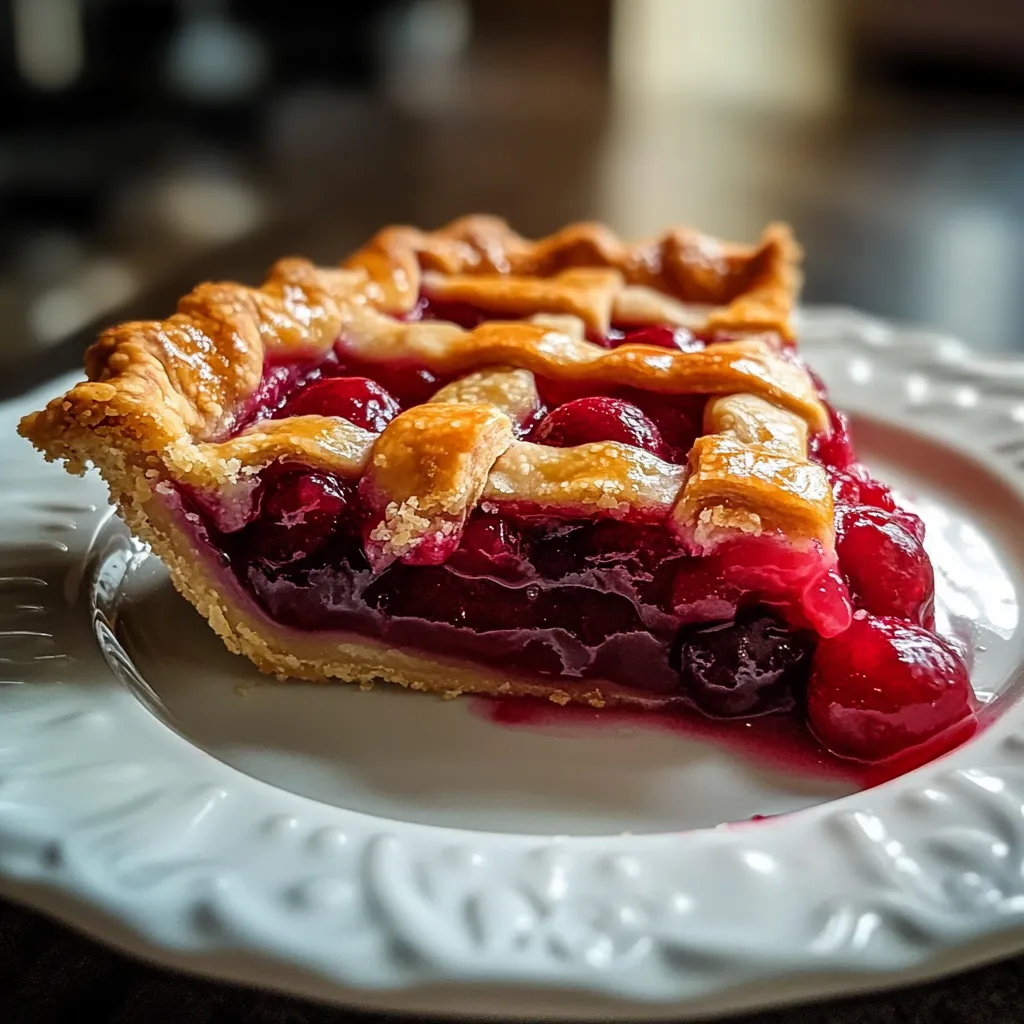
Cooling is crucial — slicing too soon can cause the filling to spill. Once set, each slice should hold its shape beautifully, with the rich, glossy cherry filling and crisp, buttery crust.
Flavor Variations and Extra Touches
Try adding a pinch of almond extract to the filling for a subtle nutty undertone, or mix a few blackberries into the cherries for a slightly tart twist. Brushing the crust with a bit of cream or sprinkling extra coarse sugar before baking gives an extra golden shine and a delicate crunch.
Quick Nutrition Snapshot
Cherries are naturally rich in antioxidants and vitamin C, making this pie a slightly healthier indulgence. Using fresh ingredients and controlling sugar levels gives you a dessert that’s as wholesome as it is delicious.
Your Cherry Pie Questions Answered
Can I use frozen cherries?
Yes — just thaw and drain excess liquid before cooking to prevent a runny pie.
Why does my filling sometimes run?
Make sure to cook the filling until thick and let it cool before baking. Cornstarch helps it set.
Can I make the crust ahead of time?
Absolutely. The dough can be prepared and chilled for up to two days before rolling.
How do I store leftovers?
Cover loosely with foil or plastic wrap and keep at room temperature for one day or refrigerate for up to three days. Reheat slightly before serving.
Making a homemade cherry pie with a lattice crust is a labor of love, but every golden, glossy slice is worth it. The combination of flaky pastry, sweet-tart cherries, and that little extra handmade touch will impress anyone lucky enough to get a piece.
