
A Savory Spin on the Classic Cheeseburger
If you love cheeseburgers but want something a little more fun (and a lot less messy), these Garlic Butter Beef Cheeseburger Rollups are your next go-to recipe. Imagine juicy, seasoned beef wrapped in a soft tortilla, smothered in melted cheese, and brushed with rich garlic butter. It’s everything you love about a classic burger—but with that warm, toasty crunch that makes each bite irresistible.
I first made these for a casual movie night, and they disappeared in minutes. They’re perfect for game days, easy dinners, or even as a hearty snack. Plus, they come together fast—no grill required and no complicated steps, just layers of flavor rolled up into cheesy perfection.
What You’ll Need to Make These Irresistible Rollups
This recipe keeps things simple but delivers big on taste. You probably already have most of these ingredients in your kitchen.
Ingredients:
- 1 lb ground beef
- ½ cup shredded cheddar cheese
- ½ cup shredded mozzarella cheese
- 1 tablespoon olive oil
- 4 large flour tortillas
- ¼ cup butter, melted
- 3 cloves garlic, minced
- 1 tablespoon Worcestershire sauce
- 1 teaspoon onion powder
- 1 teaspoon garlic powder
- ½ teaspoon smoked paprika
- Salt and black pepper, to taste
- Optional: sliced pickles for garnish
Prepping and Cooking the Perfect Beef Filling
Start by preheating your oven to 375°F (190°C) and lining a baking sheet with parchment paper. This helps prevent sticking and makes cleanup a breeze.
Heat olive oil in a large skillet over medium-high heat. Add the ground beef and cook until browned, breaking it up with your spatula as it sizzles. You’ll know it’s ready when most of the moisture cooks off and the beef takes on a rich, golden color.
Now, season generously. Stir in Worcestershire sauce, onion powder, garlic powder, smoked paprika, and a pinch of salt and pepper. The Worcestershire adds a subtle tang and depth, while the spices create that “burger” flavor we all crave. Once everything’s combined, remove the skillet from the heat and let the mixture cool slightly so the cheese won’t melt too early.
The Magic Touch – Making the Garlic Butter
In a small bowl, stir together the melted butter and minced garlic. The aroma alone will have you hungry in seconds. This mixture is what gives the rollups that golden, flavorful crust and makes your kitchen smell like a cozy diner.
Assembling the Rollups Step by Step
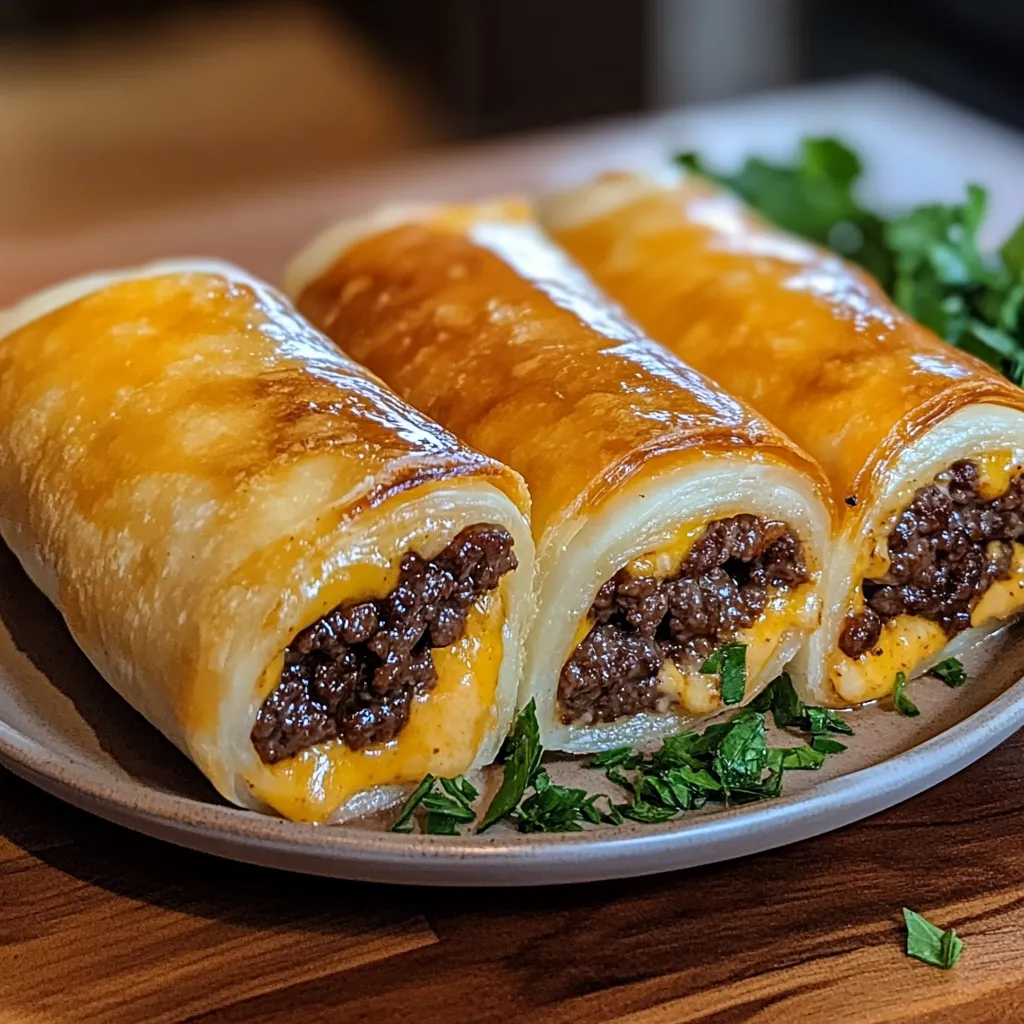
Lay out your tortillas on a clean surface. Evenly spoon the beef mixture over each one, spreading it to the edges but leaving a little border so it doesn’t spill out when rolling. Sprinkle the shredded cheddar and mozzarella on top—half for that sharp, melty bite and half for that gooey stretch.
Now roll each tortilla tightly, tucking in the sides as you go to hold everything in. Place each roll seam-side down on your prepared baking sheet to keep them from unrolling during baking.
Brushing, Baking, and Browning to Perfection
Once all your rollups are assembled, brush the tops generously with the garlic butter mixture. Don’t hold back here—it’s what gives you that irresistible, buttery crunch and deep flavor once baked.
Pop the baking sheet into the oven and bake for about 15–18 minutes, or until the tortillas are golden brown and crisp and you can see the cheese bubbling through the seams. When you pull them out, you’ll notice that buttery, garlicky scent that instantly says “comfort food.”
Let them cool for a few minutes before slicing—they’ll hold together better that way.
Tips for Getting That Cheeseburger Flavor Just Right
- Don’t skip the Worcestershire sauce. It gives a savory umami flavor that makes these taste like real cheeseburgers.
- Use a mix of cheeses. The blend of cheddar and mozzarella gives both flavor and stretch.
- Brush twice with garlic butter. Once before baking and again right after they come out of the oven for extra shine and flavor.
- Try mini tortillas. Perfect if you’re serving them as appetizers or party bites.
Serving and Storing Your Garlic Butter Rollups
Serve these warm with your favorite dipping sauces—ketchup, mustard, or even a creamy burger sauce. A few pickle slices on the side add a fresh, tangy contrast to all that richness.
If you have leftovers (which is rare), store them in an airtight container in the fridge for up to three days. Reheat in the oven or air fryer to keep the tortillas crisp instead of microwaving, which can make them soggy.
Creative Twists and Variations
You can easily switch up the flavors:
- Add crispy bacon bits or caramelized onions inside for a richer taste.
- Swap the ground beef for turkey or chicken for a lighter version.
- Use pepper jack or Swiss cheese for a new flavor twist.
- Brush with herb butter instead of garlic butter for a fragrant, Italian-inspired variation.
Nutrition Snapshot – Indulgent but Worth Every Bite
These rollups are hearty and satisfying, with plenty of protein from the beef and cheese. Yes, they’re a little indulgent thanks to the butter and cheese—but they’re meant to be a treat. Pair with a fresh side salad or roasted vegetables if you want to balance things out.
Tasty Questions Answered – Your Rollup Q&A
Can I make these ahead of time?
Yes! You can assemble them a few hours ahead, cover tightly, and refrigerate. Just brush with garlic butter and bake when ready to serve.
Can I freeze them?
Absolutely. Bake first, let them cool, then wrap and freeze. Reheat in the oven until hot and crisp again.
What’s the best cheese combo?
Cheddar for sharpness, mozzarella for melt—together they create that perfect burger-inspired texture.
Can I make them vegetarian?
Yes, use a meat substitute or sautéed mushrooms with the same seasoning mix.
What sides go well with these?
They’re great with fries, a side salad, or even a creamy coleslaw for contrast.
These Garlic Butter Beef Cheeseburger Rollups are comfort food at its best—simple, hearty, and packed with flavor. Once you try them, they’re sure to become a new family favorite.
