
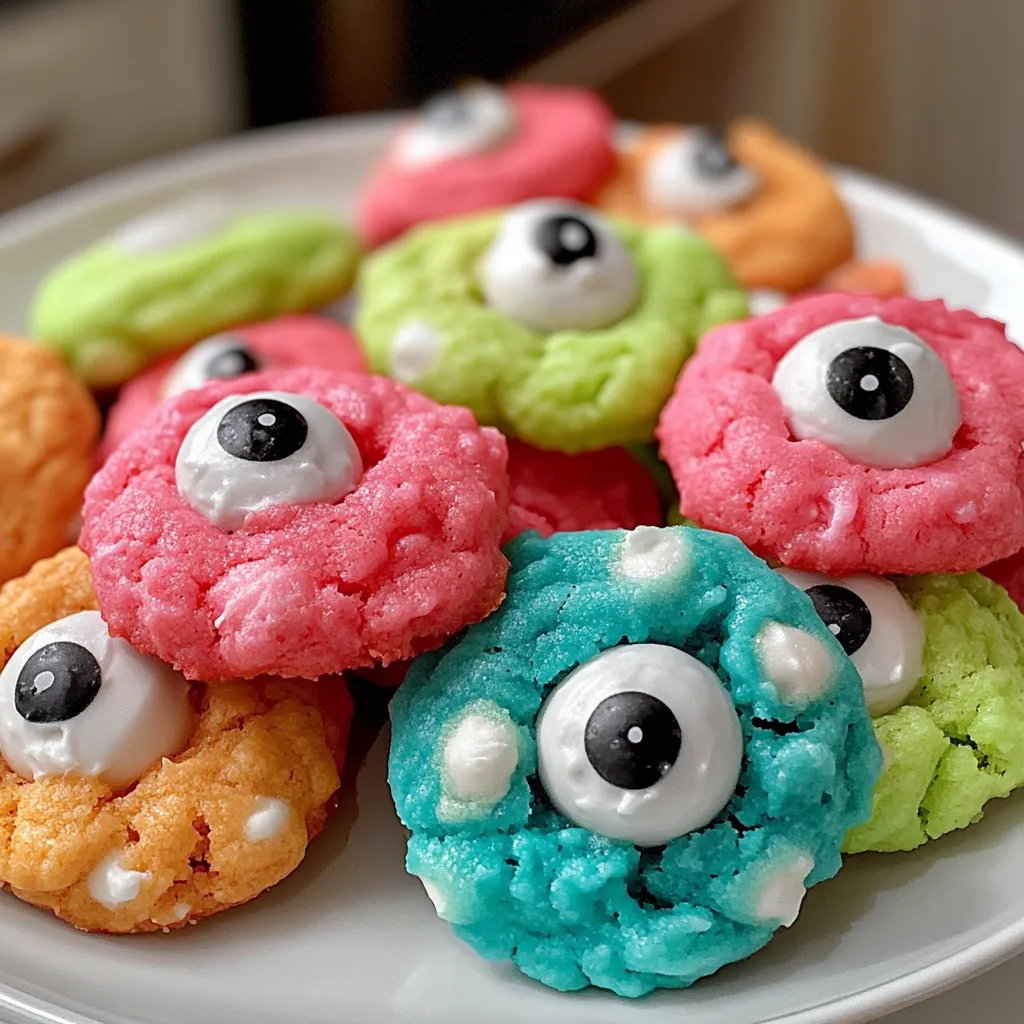
There’s something instantly playful about these Gooey Monster Cookies. Bright colors, soft centers, and those little candy eyes staring back at you—it’s the kind of recipe that makes baking feel fun again. I first made these on a whim for a weekend treat, and I wasn’t expecting how incredibly soft and almost melt-in-your-mouth they’d be.
They remind me a bit of bakery-style cookies, but with a quirky, homemade personality. The cream cheese gives them that rich, tender texture, and the powdered sugar coating creates a delicate crackled look as they bake. Honestly, the hardest part is not eating the dough before it even hits the oven.
Why These Gooey Monster Cookies Are So Irresistible
What makes these cookies stand out is their texture. They’re not your typical crisp cookie—they’re soft, slightly chewy, and almost cake-like in the center. The outside has that light sugary coating that gives a subtle crunch, and inside stays beautifully gooey.
I love how customizable they are too. You can go wild with colors, making them perfect for birthdays, holidays, or just a fun baking day when you want something cheerful in the kitchen.
Ingredients You’ll Need
This recipe uses simple ingredients with a fun twist.
- 1 (14.25-ounce) box white cake mix
- 1/2 cup butter, softened
- 1/2 teaspoon vanilla extract
- 8 ounces cream cheese, softened
- 1 egg
- Powdered sugar (for coating)
- Food coloring
- Candy eyeballs
Everything comes together quickly, and you don’t need any complicated techniques.
Mixing the Dough – Creating That Signature Creamy Base
Start by adding the softened butter, cream cheese, egg, and vanilla extract to a mixing bowl. Beat everything together until the mixture becomes smooth and fluffy. You’ll notice it turning pale and creamy, which is exactly what you want.
Next, add the cake mix gradually. The dough will thicken quickly and become soft and slightly sticky. It might feel different from traditional cookie dough—that’s normal. The cream cheese gives it that unique texture.
Adding Color – Bringing Your Monster Cookies to Life
Divide the dough into separate bowls depending on how many colors you want to use. Add a few drops of food coloring to each portion and mix until the color is evenly distributed.
This is honestly my favorite part. Sometimes I go for bright greens and purples for a “monster” theme, but you can do pastels or even mix colors slightly for a marbled look. There’s no wrong way here.
Chilling the Dough – The Secret to Easy Handling
Once colored, cover the dough and place it in the fridge to chill. This step is important. The dough is quite soft at first, and chilling firms it up so it’s easier to roll.
I usually leave it for about 30 to 60 minutes. When you come back to it, it should feel much more manageable, not sticky all over your hands.
Shaping and Coating – Getting That Crinkle Finish
Scoop out small portions of dough and roll them into balls using your hands. Then roll each ball generously in powdered sugar until fully coated.
Place them on a greased or lined baking sheet, leaving space between each one. Gently press them down just slightly—don’t flatten too much, as they will spread naturally in the oven.
Baking to Gooey Perfection
Bake the cookies in a preheated oven at around 175°C (350°F) until they are set on the outside but still soft in the center. This usually takes about 10 to 12 minutes.
Keep an eye on them. You don’t want overbaking here—that’s what keeps them gooey. The tops will crack slightly, showing hints of color through the powdered sugar, which looks beautiful.
Decorating with Candy Eyeballs
As soon as the cookies come out of the oven, gently press candy eyeballs onto each one while they’re still warm. They’ll stick easily without needing any extra icing.
This step brings the whole “monster” idea together. Each cookie ends up with its own funny little personality, which makes them great for kids or themed parties.
Serving and Storing Your Monster Cookies
Let the cookies cool slightly before serving, though I’ll admit they’re amazing when still a bit warm. The centers stay soft and almost creamy, which is hard to resist.
Store them in an airtight container at room temperature for up to three days. If you want to keep them longer, refrigerate them, but let them come to room temperature before serving for the best texture.
Fun Variations to Try
You can easily switch things up with this recipe. Add chocolate chips or white chocolate chunks for extra sweetness. Try swirling two colors together for a marbled effect. You could even skip the eyeballs and turn them into festive cookies for different occasions by changing the colors.
Sometimes I add a hint of almond extract along with the vanilla for a slightly different flavor—it’s subtle but really nice.
Nutrition Snapshot
These cookies are definitely a treat. The cream cheese and butter make them rich, while the cake mix keeps things sweet and soft. They’re perfect for special occasions or when you want something fun rather than everyday snacking.
Gooey Monster Cookies FAQ
Can I make the dough ahead of time?
Yes, you can prepare the dough and refrigerate it for up to 24 hours before baking.
Why is my dough too sticky?
It likely needs more chilling time. Pop it back in the fridge until it firms up.
Can I freeze these cookies?
Yes, both the dough and baked cookies freeze well. Just thaw and bake or serve as needed.
Do I have to use cake mix?
The cake mix is key to the texture and flavor, so it’s best not to substitute it in this recipe.
How do I keep them soft?
Store them in an airtight container and avoid overbaking. The slightly underbaked center is what keeps them gooey.
These Gooey Monster Cookies are one of those recipes that never fail to make people smile. They’re colorful, soft, and just a little bit silly in the best way. Once you try them, you’ll probably find yourself making them again whenever you want something fun and easy to bake.
