
A Sweet Taste of Nostalgia – The Story Behind Classic Chocolate Cake Pops
Cake pops are one of those desserts that instantly bring a smile, both for the maker and the lucky recipients. They combine the rich, indulgent flavor of chocolate cake with the playful convenience of a lollipop. I remember making these as a teenager for birthday parties, carefully rolling each ball and trying to get the chocolate coating smooth. There’s something deeply satisfying about transforming a regular cake into bite-sized, fun-to-eat treats. The smell of chocolate and cake baking together fills the kitchen with pure joy, and the final glossy finish is a treat for the eyes as much as the taste buds.
What You’ll Need to Make These Bite-Sized Chocolate Treats
Making cake pops is simple if you have the right ingredients and supplies on hand.
Ingredients:
- Chocolate Cake: 1 standard 9×13 inch cake (baked and cooled)
- Chocolate Frosting: 1/2 to 3/4 cup (homemade or store-bought)
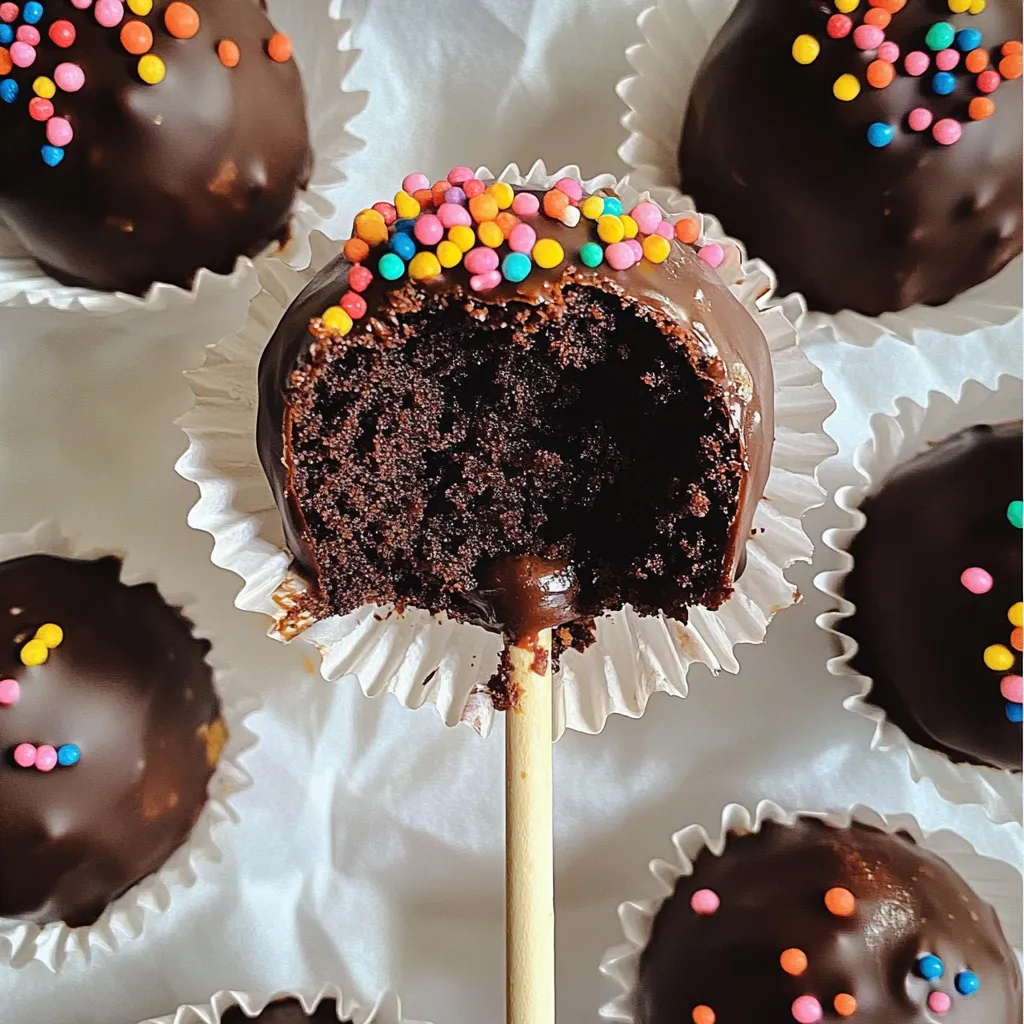
- Chocolate Melting Wafers: 16 oz (450g) Dark or Milk chocolate
- Decorations: Rainbow nonpareil sprinkles
- Supplies: Lollipop sticks and a styrofoam block (to hold them upright)
Having everything ready before you start makes the process smooth and enjoyable.
Preparing Your Cake for Perfect Cake Pops
Start by crumbling the cooled chocolate cake into a large bowl. I usually use my hands—it’s therapeutic and ensures no big chunks remain. You want fine, even crumbs, because these will form the base for your cake balls.
Once the cake is fully crumbled, add 1/2 cup of frosting. Use a spatula or your hands to combine until it reaches a smooth, playdough-like consistency. If it’s too dry to hold shape, add more frosting one tablespoon at a time. I love feeling the mixture come together; it’s oddly satisfying how crumbly cake magically becomes moldable dough.
Crafting the Cake Balls – Rolling for Smooth Perfection
Scoop about 1 tablespoon of the mixture and roll it into a tight, smooth ball. Place the finished balls on a parchment-lined tray. Repeat until all the mixture is used. Don’t worry if a few balls aren’t perfectly round—they still taste amazing, and the chocolate coating will smooth out minor imperfections.
Once all the balls are rolled, refrigerate them for 30-60 minutes, or freeze for about 15 minutes, until they are firm but not frozen. Chilling is essential so the balls hold their shape when dipped in chocolate.
Tips for Even Coating and Handling
- Keep balls firm but not frozen. Frozen balls can crack the chocolate coating.
- Use a small amount of chocolate as glue. Dipping the stick tip in melted chocolate before inserting prevents the pops from sliding off.
- Work in small batches. Chocolate sets quickly, so dipping too many at once can be messy.
- Maintain smooth chocolate. Stir occasionally while dipping to avoid clumps or graininess.
Dipping and Decorating – Achieving a Smooth, Glossy Finish
Melt the remaining chocolate in a deep, narrow microwave-safe bowl. Hold each cake pop by the stick and dip straight down until fully submerged, then lift it straight up. Gently tap the stick on the edge to remove excess chocolate.
While the chocolate is still wet, immediately sprinkle on the rainbow nonpareils. I love seeing the bright, cheerful colors contrast with the dark chocolate—it’s like edible confetti. Place the finished pops upright in a styrofoam block or a heavy glass to set. Let them rest at room temperature for about an hour until the chocolate hardens completely.
Serving and Storing Your Homemade Cake Pops
Cake pops are perfect for parties, gifts, or just a special treat at home. Serve them on a decorative tray or in small cups for a fun presentation. They also make a fantastic interactive activity if you’re making them with kids—they can decorate their own.
Store cake pops in an airtight container at room temperature for up to 3 days or in the fridge for up to a week. Avoid high humidity; it can make the chocolate coating sticky.
Creative Ways to Use Cake Pops in Desserts and Gifts
Cake pops aren’t just for snacking. They make excellent garnishes for cakes, cupcakes, or even ice cream sundaes. You can dip them in white chocolate, drizzle with colored candy melts, or coat them with crushed cookies for variety. They also make charming homemade gifts—arranged in a decorated cup or small box, they look festive and thoughtful.
Variations to Try – From White Chocolate to Fun Flavors
Once you’ve mastered classic chocolate cake pops, experiment with other flavors. Vanilla cake with chocolate coating, red velvet with cream cheese frosting, or even peanut butter chocolate combinations are all fantastic. Try adding sprinkles, crushed nuts, or coconut flakes for extra texture and visual appeal.
Nutrition Snapshot – Sweet Facts About This Classic Treat
Cake pops are a small indulgence that packs chocolate flavor in a single bite. They’re perfect for portion control and sharing at parties. While rich in sugar and chocolate, they are a fun way to enjoy dessert in moderation, and because you control the ingredients, you can use high-quality chocolate and frosting for better flavor and satisfaction.
Sweet Questions Answered – Your Cake Pop FAQ Corner
Can I use store-bought cake instead of homemade?
Yes, store-bought cake works fine. Just make sure it’s fully cooled and crumbled well.
What if my balls fall off the sticks?
Dip the stick tip in melted chocolate before inserting and ensure the balls are chilled. This acts as a glue and keeps them secure.
Can I freeze the cake pops?
Yes, freeze them after dipping in chocolate. Wrap individually in plastic to avoid freezer burn.
Why is my coating clumpy?
Clumpy chocolate usually means it wasn’t melted evenly. Stir thoroughly and avoid overheating.
How long do they last?
At room temperature, about 3 days. In the fridge, up to a week. Avoid storing in humid areas.
Making classic chocolate cake pops is a fun, hands-on way to enjoy cake in a portable, playful form. The glossy chocolate coating, colorful sprinkles, and rich cake inside make every bite a little celebration.
