
H2: Why These Old-Fashioned Candied Orange Slices Still Charm Today
Despite the heading, what makes these tahini cookies so special is that same sense of nostalgia—just with a modern twist. They remind me of classic chocolate chip cookies, but with a deeper, almost toasted flavor from the tahini. The first time I baked them, I wasn’t sure what to expect, but the aroma alone convinced me. Warm, nutty, slightly caramel-like—it fills the kitchen in the best way.
H3: The nostalgic roots of citrus candying at home
While tahini cookies don’t come from the same tradition as candied fruit, they still carry a sense of history. Tahini has been used in baking across many cultures, and bringing it into a familiar cookie recipe feels like blending old and new. It’s one of those recipes that sparks curiosity but quickly becomes a favorite.
H2: What You’ll Need for Perfect Sugar-Coated Orange Rounds
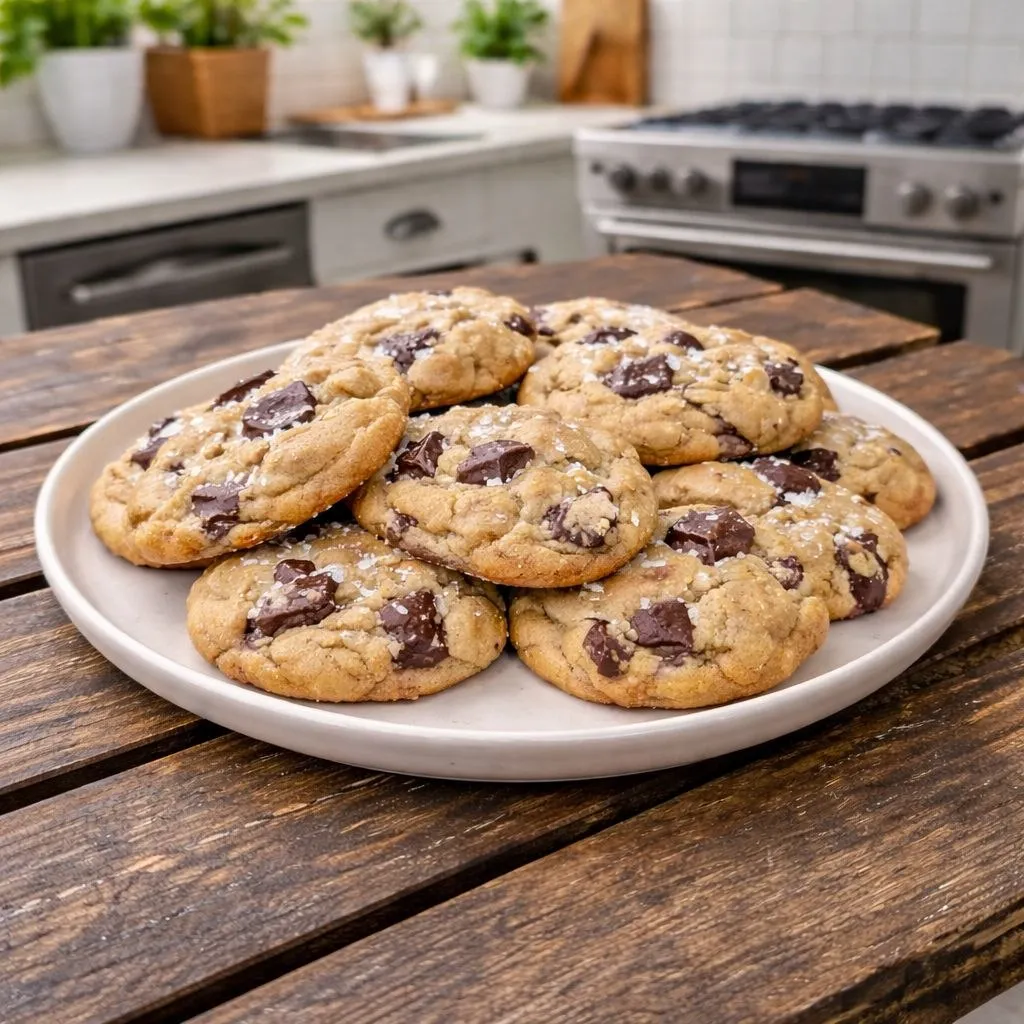
This recipe keeps things simple but flavorful. Each ingredient plays a role in creating that soft, chewy texture with crisp edges.
Ingredients:
- 8 tbsp unsalted butter, room temperature
- 1/2 cup tahini, well stirred
- 1/2 cup granulated sugar
- 1/2 cup light brown sugar
- 1 large egg
- 1 large egg yolk
- 1 tsp vanilla extract
- 1 cup + 2 tbsp flour
- 3/4 tsp baking soda
- 1 tsp kosher or sea salt
- 2 cups chocolate chunks or chips
- Flaky sea salt, for topping
H3: Choosing the right oranges for flavor and texture
In this case, it’s really about choosing a good tahini. I’ve learned the hard way that not all tahini is the same. Look for one that’s smooth, pourable, and well blended—not dry or overly bitter. A good tahini adds richness without overpowering the cookie.
H2: From Fresh Fruit to Jewel-Like Candy: The Full Method
Start by creaming the butter, tahini, and both sugars together. This step is key—take your time until the mixture looks light and fluffy. It should feel smooth and slightly airy.
Add the egg, extra yolk, and vanilla extract. Mix until everything comes together into a creamy base. The extra yolk makes a difference—you’ll notice a richer dough almost immediately.
In a separate bowl, whisk together the flour, baking soda, and salt. Gradually add this to the wet mixture, mixing just until combined. Try not to overwork it here; the dough should stay soft.
Fold in the chocolate chunks gently. I like using chunks instead of chips because they create those melty pockets of chocolate, but either works.
Cover the dough and refrigerate until firm. This step really improves the texture and flavor. I usually leave it for at least an hour, sometimes longer if I can wait.
Shape the dough into balls and place them on a lined baking sheet, leaving space between each one.
Bake until the edges are golden and the centers are still slightly pale. Halfway through baking, rotate the tray for even results. You’ll notice the cookies puff slightly and then settle.
As soon as they come out of the oven, sprinkle flaky sea salt on top. Let them cool on the baking sheet—they’ll continue to set as they rest.
H3: Simmering, drying, and coating explained clearly
For cookies, this translates to baking, resting, and finishing. The baking sets the structure, the resting time improves texture, and the salt topping enhances flavor. It’s a simple sequence, but each step matters more than you’d think.
H2: Pro Tips for Achieving Glossy, Translucent Slices
For these cookies, it’s all about achieving that perfect chewy center with crisp edges.
H3: Controlling heat and timing for ideal results
Keep an eye on your oven. Slightly underbaking is better than overbaking here. The centers should look soft when you pull them out—they’ll firm up as they cool. I’ve overbaked a batch before, and while still tasty, they lost that signature chewiness.
H2: Common Candying Mistakes and How to Avoid Them
Even simple recipes have their tricky moments.
H3: Fixing bitterness, stickiness, or uneven drying
If your cookies taste slightly bitter, it could be the tahini. Try a different brand next time. If they spread too much, the dough likely wasn’t chilled enough. And if they bake unevenly, rotating the tray halfway through usually fixes it.
H2: Flavor Twists and Creative Variations to Try
Once you’ve made these once, it’s hard not to experiment.
H3: Adding spices or dipping in chocolate
A pinch of cinnamon or a hint of espresso powder works beautifully here. You can also drizzle melted chocolate on top after baking for an extra indulgent touch. I’ve even tried adding chopped nuts for crunch, and it turned out great.
H2: How to Serve, Gift, and Store Candied Orange Slices
These cookies are perfect warm, when the chocolate is still soft and the edges are just crisp.
H3: Keeping them fresh and beautifully presented
Store them in an airtight container at room temperature for a few days. They stay soft longer than you’d expect. If you’re gifting them, a simple box with parchment paper works perfectly—they look rustic and inviting without much effort.
H2: Sweet Curiosities: Your Candied Orange Questions Answered
Can I make the dough ahead of time?
Yes, and it actually improves the flavor. Letting it rest in the fridge overnight deepens the taste.
Why add an extra egg yolk?
It adds richness and helps create that soft, chewy texture.
Can I skip the flaky salt on top?
You can, but I wouldn’t recommend it. That little burst of salt really balances the sweetness and brings everything together.
What type of chocolate works best?
Chunks give you those gooey pockets, but chips are more consistent. It depends on what you prefer.
Can I freeze the dough?
Absolutely. Scoop into balls first, freeze, then bake straight from frozen—just add a minute or two to the baking time.
These cookies are one of those recipes that feel a little special without being complicated. Once you try them, they tend to become a regular in the rotation.
