
There’s something incredibly comforting about baked fruit, especially when it’s gently sweetened with honey and infused with vanilla. These Honey Vanilla Baked Pears are one of those quiet, cozy desserts that don’t try too hard but still feel special every single time.
I often make this when I want something sweet without turning on my mixer or dealing with complicated steps. The smell alone—warm honey, soft fruit, and a hint of vanilla—fills the kitchen in the most relaxing way. It’s the kind of dessert that feels like a slow afternoon.
Why These Honey Vanilla Baked Pears Are So Special
What makes this recipe stand out is its simplicity. You’re working with just a handful of ingredients, but the result is soft, juicy pears soaked in a naturally sweet, buttery sauce. The pears almost melt in your mouth, while the syrup at the bottom becomes rich and fragrant.
It’s also one of those desserts that can feel light or indulgent depending on how you serve it. I love that flexibility—you can keep it simple with yogurt or go all in with ice cream.
Ingredients You’ll Need
- 4 ripe but firm pears
- 1 tablespoon unsalted butter, melted
- 2 tablespoons honey
- 1/4 teaspoon vanilla extract
- 1/2 cup apple juice
These ingredients come together in such a natural way. Nothing overpowering, just gentle sweetness and warmth.
Preparing the Pears for Baking
Start by preheating your oven to 350°F. While it warms up, prepare your pears. Wash them well, then slice each one in half lengthwise.
Use a spoon to scoop out the seeds and core. I usually take a little extra time here to make a neat hollow—it helps the sauce settle nicely into the center while baking. Trim a tiny bit off the bottom so they sit flat in the baking dish. It’s a small step, but it makes a big difference when serving.
Place the pears cut side up in a baking dish. You’ll already notice their fresh, slightly floral scent.
Making the Honey Vanilla Glaze
In a small bowl, combine the melted butter, honey, and vanilla extract. Stir until everything is smooth and blended. The mixture should look glossy and smell lightly sweet with that soft vanilla note.
Spoon this mixture generously over each pear half, letting it pool slightly in the center. Don’t worry if it drips into the dish—that’s exactly what you want.
Pour the apple juice into the bottom of the baking dish. This helps create steam and keeps the pears moist as they bake.
Baking the Pears to Soft Perfection
Cover the dish with foil and place it in the oven. Bake for about 20 to 25 minutes, until the pears begin to soften.
Then remove the foil and carefully spoon some of the warm juices from the bottom of the dish back over the pears. This step is one of my favorites—it’s where the pears start to take on that glossy, caramel-like finish.
Return the dish to the oven uncovered and continue baking for another 15 to 20 minutes. The pears should become very tender and juicy, but still hold their shape.
You’ll know they’re ready when a knife slides in easily and the edges look slightly golden.
Texture, Flavor, and Aroma Notes
The final result is soft, delicate pears with a silky texture. The honey and butter create a light syrup that’s sweet but not overwhelming. The vanilla adds warmth without taking over.
As they bake, the aroma is gentle but inviting. It’s not overly sugary—just a natural, comforting scent that makes you want to peek into the oven more often than necessary.
I always end up tasting one straight from the dish, even when it’s too hot. It’s hard to resist.
Helpful Tips for Best Results
Choose pears that are ripe but still firm so they hold their shape while baking.
Don’t skip covering them at the beginning—this helps them soften evenly.
Baste the pears during baking to enhance flavor and keep them glossy.
If your pears are very large, you may need a little extra baking time.
Variations You Can Try
You can easily adapt this recipe depending on your mood. Add a pinch of cinnamon or nutmeg for a warmer spice profile. A few chopped nuts like walnuts or almonds add a nice crunch.
For something richer, drizzle a little extra honey before serving or add a spoon of cream. You can also swap apple juice for orange juice for a slightly brighter flavor.
Serving and Storage
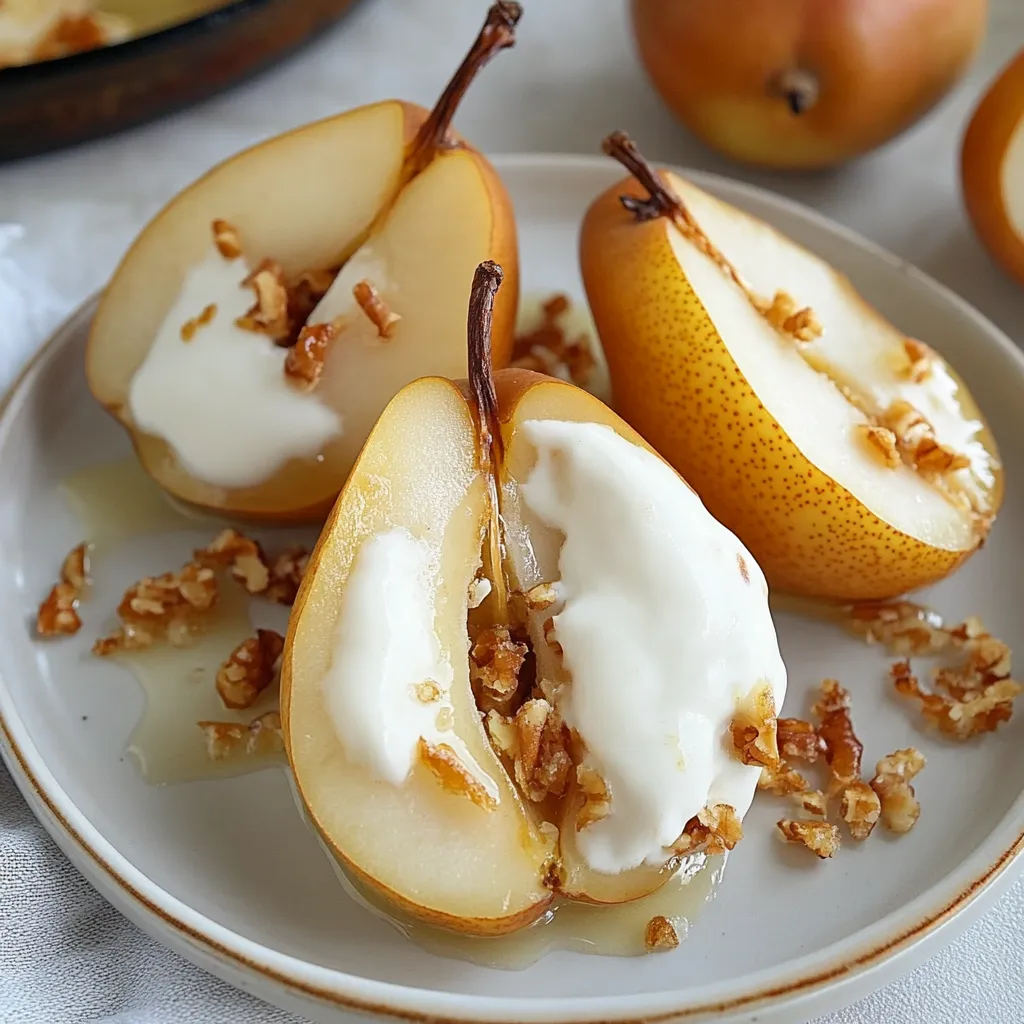
Serve these baked pears warm, straight from the dish. They pair beautifully with yogurt for a lighter option, or with vanilla ice cream if you want something more indulgent. Granola on top adds a lovely contrast in texture.
If you have leftovers, store them in an airtight container in the fridge for up to three days. Reheat gently in the oven or microwave with a bit of the sauce to keep them moist.
Nutrition Snapshot
This dessert is naturally lighter than most baked sweets. You’re getting fiber and nutrients from the pears, along with natural sugars from the honey. It’s a great option when you want something sweet without feeling too heavy.
Honey Vanilla Baked Pears FAQ
Can I use canned pears instead of fresh?
Fresh pears work best because they hold their texture. Canned pears tend to become too soft.
How do I know when the pears are done?
They should be tender when pierced with a knife but not falling apart.
Can I make this ahead of time?
Yes, you can bake them ahead and reheat gently before serving.
What type of pears are best?
Bosc or Anjou pears are ideal because they stay firm during baking.
Can I make this without butter?
You can skip the butter or replace it with a small amount of coconut oil, though the flavor will change slightly.
These Honey Vanilla Baked Pears are one of those recipes that remind you how beautiful simple cooking can be. With just a few ingredients and a little patience, you end up with something warm, fragrant, and truly comforting.
