
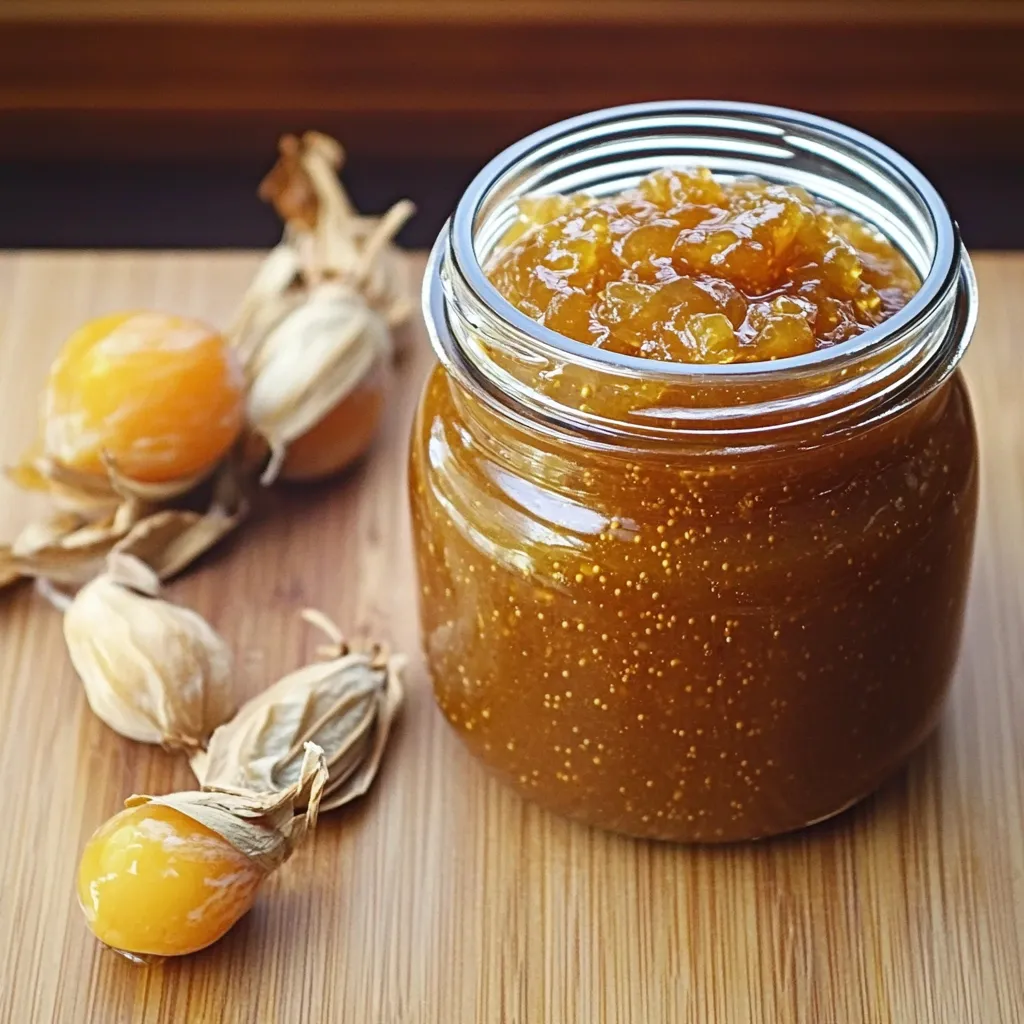
A Sweet Taste of Nostalgia – The Story Behind Ground Cherry Jam
Ground cherries are one of those magical little fruits that feel like a secret treasure in the garden. When I first tried making jam with them, I was blown away by their natural sweetness combined with a subtle tang—like a mix between a tomato and a pineapple.
This Ground Cherry Jam recipe is a classic way to preserve their flavor year-round. The smell as they cook is incredible—a gentle, fruity aroma that fills the kitchen with warmth and excitement. I love the ritual of husking each tiny fruit and watching it burst into a golden, syrupy jam. It’s a slow, meditative process that feels satisfying and homey.
What You’ll Need to Make This Sweet and Tangy Jam
Making this jam requires minimal ingredients, but quality matters. Fresh, ripe ground cherries and good lemon juice make all the difference.
Ingredients:
- 3 cups ground cherries, husked (about 2 lbs or 5 pints in husks)
- 1 cup sugar
- 2 tablespoons lemon juice (bottled)
Simple ingredients transform into a jam that’s bright, tangy, and perfect on toast or tucked into desserts.
Preparing Your Ground Cherries for the Perfect Jam
Start by husking each ground cherry. It takes a little patience, but it’s part of the fun. Once husked, rinse them gently under cool water to remove any dust or debris.
Place the cherries in a medium saucepan. Add the lemon juice to help balance the natural sweetness and intensify the flavor. I love how the small, golden fruits shine against the pan as you begin cooking—they practically glow.
Cooking the Cherries – Unlocking Natural Juices and Flavor
Place the saucepan over low heat and start cooking the cherries slowly. Stir occasionally to help them break down and release their juices. You’ll notice the first pops of fruit—they’re small, satisfying, and tell you that the magic is happening. The kitchen fills with a bright, fruity fragrance that makes waiting worthwhile.
Adding Sugar and Thickening the Jam
Once the cherries have softened and released their liquid, it’s time to add sugar. Increase the heat to medium and stir until fully dissolved. Continue cooking for about 15 minutes or until the mixture thickens to a jam-like consistency.
You’ll notice the texture change as it cooks: the liquid reduces, the jam glistens, and the rich golden color deepens. I love tasting it as I go—it’s sweet, tangy, and a little addictive.
Tips for Perfect Jam Every Time
- Use ripe ground cherries. Under-ripe fruit can make the jam tart and overly firm.
- Stir constantly toward the end. It helps prevent sticking or burning at the bottom.
- Test the consistency. Place a spoonful on a cold plate—if it holds its shape after a minute, it’s ready.
- Don’t overcook. Jam thickens slightly as it cools, so remove from heat while still a little soft.
These small touches make the difference between a jam that’s runny and one that sets beautifully.
Pouring and Storing – Preserving Your Golden Harvest
Pour the hot jam into clean quarter-pint mason jars, leaving about 1/4 inch of headspace. This ensures a safe seal if you’re water-bath canning. Wipe the rims clean before capping to avoid sticky messes or imperfect seals.
If you plan to enjoy it soon, store the jam in the refrigerator for up to three weeks. For long-term storage, process the jars in a water bath canner for 5 minutes. The result is a shelf-stable jam that keeps the taste of summer in every spoonful.
Creative Ways to Enjoy Ground Cherry Jam
Ground Cherry Jam isn’t just for toast. Spread it on scones, swirl it into yogurt, or dollop it over cheesecake for a tangy twist. I often use a spoonful in salad dressings for a fruity kick—it’s surprisingly versatile.
It also makes a thoughtful homemade gift. A jar tied with a ribbon feels personal, charming, and extra special for friends and family.
Variations to Try – Adding Flavors and Twists
Once you’ve mastered the basic jam, experiment with additional flavors. A pinch of cinnamon or a few fresh mint leaves adds a new dimension. You could also combine ground cherries with raspberries or blueberries for a mixed fruit jam. For a richer taste, try adding a splash of vanilla extract just before bottling.
Nutrition Snapshot – Sweet Facts About This Homemade Jam
Ground cherries are rich in vitamin C and antioxidants, making this jam a slightly healthier indulgence than many store-bought options. Each spoonful carries the bright, fruity flavor of fresh fruit without artificial preservatives or colors. Enjoy it mindfully—just enough to satisfy your sweet cravings.
Sweet Questions Answered – Your Ground Cherry Jam FAQ Corner
Can I use frozen ground cherries?
Yes, but thaw and drain them first to remove excess water before cooking.
Why is my jam too runny?
It may need more cooking time to reduce, or the fruit wasn’t ripe enough. Always test on a cold plate before bottling.
Can I can this jam without lemon juice?
Lemon juice helps with acidity and preservation. It’s best to include it for safety and flavor balance.
How long will this jam last?
Refrigerated, it lasts up to three weeks. Properly water-bath canned, it can last for up to a year.
Can I use alternative sweeteners?
You can experiment with honey or maple syrup, but the texture and setting may differ. Adjust cooking times as needed.
Making Ground Cherry Jam is a simple pleasure that rewards patience with flavor, color, and the cozy satisfaction of homemade goodness. Every jar feels like a little celebration of the season.
