
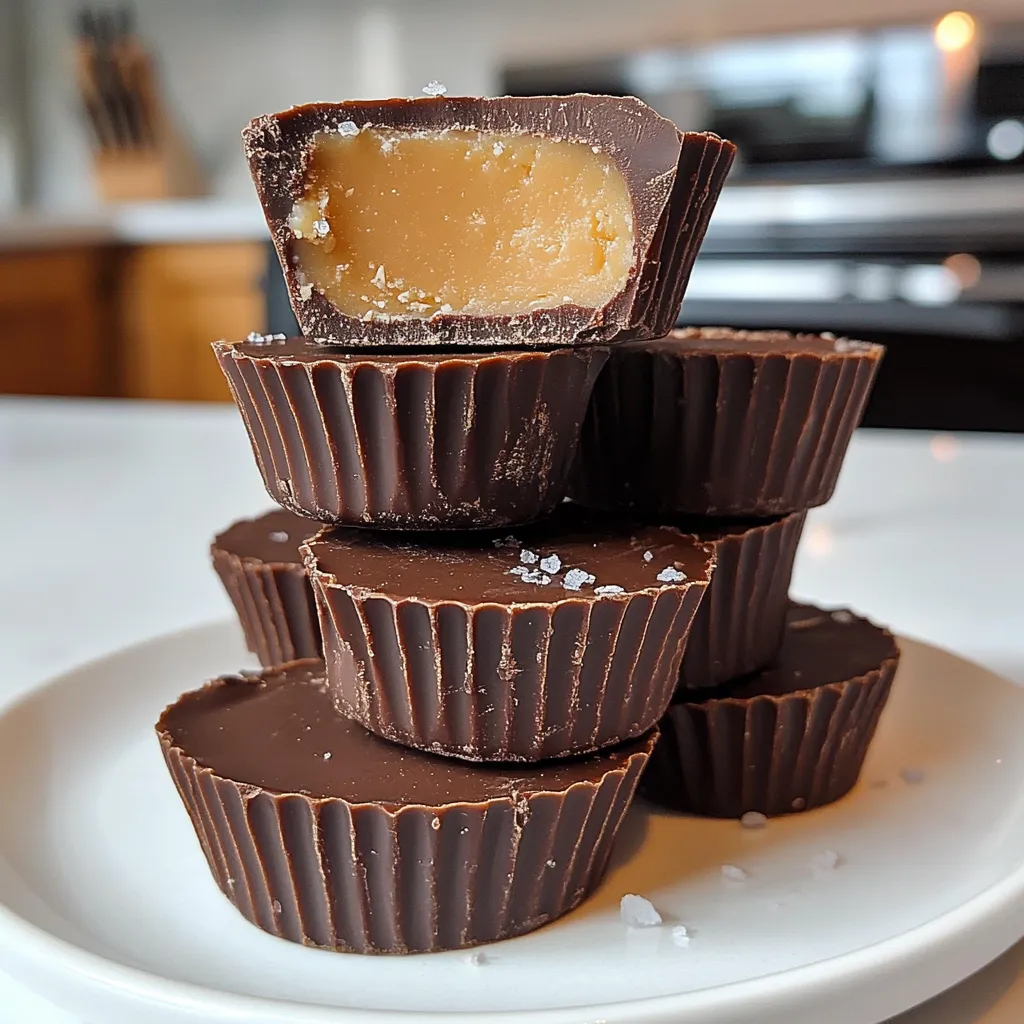
There’s something irresistible about the combination of chocolate and peanut butter. It’s one of those classic pairings that never gets old. These homemade Chocolate Peanut Butter Cups are rich, smooth, and just the right balance of sweet and salty. The best part? You control everything—the chocolate quality, the sweetness, and even the texture.
I still remember the first time I made these at home. I expected them to be good, but I didn’t expect them to taste this much better than store-bought. The chocolate has a clean snap, and the peanut butter filling is soft and creamy with just a hint of salt. You’ll notice the difference immediately.
Why These Chocolate Peanut Butter Cups Are So Good
What makes these stand out is the simplicity and freshness. There are no preservatives, no mystery ingredients—just real chocolate and a smooth, slightly sweet peanut butter center.
I also love how customizable they are. You can go darker, sweeter, saltier, or even add caramel if you’re feeling indulgent. Once you make them once, you’ll probably start experimenting without even thinking about it.
Ingredients You’ll Need
These are made with simple pantry staples.
- 2 cups chocolate (dark or milk), melted
- 1/2 cup peanut butter
- 2 tablespoons powdered sugar
- 1 tablespoon butter, softened
- Pinch of salt
Optional extras:
- Caramel for filling
- Sea salt flakes for topping
Step-by-Step Instructions for Perfect Peanut Butter Cups
Prepare the tray
Line a muffin tray with paper liners. This makes removing the cups easy and keeps their shape neat.
Create the chocolate base
Spoon about 1 tablespoon of melted chocolate into each liner. Gently tilt or use the back of the spoon to spread the chocolate slightly up the sides. This creates that classic cup shape.
Chill to set
Place the tray in the fridge for 10 to 15 minutes until the chocolate firms up. It should feel set but not too hard.
Make the peanut butter filling
In a bowl, mix the peanut butter, powdered sugar, softened butter, and a pinch of salt. Stir until smooth and creamy. The texture should be thick but easy to scoop. If it feels too stiff, let it sit for a minute to soften.
Add the filling
Spoon a small amount of the peanut butter mixture onto each chocolate base. Gently flatten it, leaving a little space around the edges so the top chocolate layer can seal it.
Seal with chocolate
Pour or spoon more melted chocolate over the peanut butter layer, making sure it fully covers the filling. Smooth the tops if needed.
Add finishing touches
If you like, sprinkle a few flakes of sea salt on top while the chocolate is still soft. It adds a nice contrast and makes them feel a bit more special.
Final chill
Refrigerate for 20 to 30 minutes until completely set. Once firm, remove from the liners and they’re ready to enjoy.
Texture, Flavor, and Aroma Notes
These peanut butter cups have that perfect bite. The chocolate snaps slightly when you bite into it, then gives way to a creamy, slightly sweet peanut butter center. The pinch of salt really brings everything together—you taste the sweetness first, then a gentle savory note at the end.
The smell is just as good. Melted chocolate always fills the kitchen with a warm, comforting aroma, and once combined with peanut butter, it becomes even more inviting.
Helpful Tips for Best Results
Use good-quality chocolate. It really makes a difference in taste and texture.
Don’t rush the chilling steps. If the base isn’t set, the layers can mix.
Keep the peanut butter layer slightly smaller than the chocolate base so it seals properly.
If your chocolate is too thick, gently warm it again to keep it smooth and easy to pour.
Variations You Can Try
You can easily switch things up depending on your mood. Add a small spoon of caramel inside for a gooey center. Use crunchy peanut butter for extra texture. Try white chocolate for a sweeter version, or dark chocolate for a more intense flavor.
You can also sprinkle chopped nuts on top or mix a little cocoa powder into the peanut butter filling for a deeper taste.
Serving and Storage
Serve these straight from the fridge for a firmer texture or let them sit at room temperature for a few minutes if you prefer them softer.
Store them in an airtight container in the fridge for up to one week. You can also freeze them for longer storage—just let them thaw slightly before eating.
Nutrition Snapshot
These treats are rich and indulgent, with healthy fats from peanut butter and energy from chocolate. They’re definitely a treat, but because they’re satisfying, one or two usually does the trick.
Chocolate Peanut Butter Cups FAQ
Can I use natural peanut butter?
Yes, but make sure it’s well stirred. Natural peanut butter can be more runny, so you may need to add a bit more powdered sugar to thicken it.
Why is my chocolate not smooth?
It may have overheated or come into contact with water. Melt chocolate gently and avoid any moisture.
Can I make these without butter?
Yes, but the filling may be slightly less creamy. The butter helps create a smoother texture.
Do I have to refrigerate them?
They hold their shape best when chilled, especially in warm environments.
Can I make them mini-sized?
Absolutely. Use a mini muffin tray and reduce the amount of each layer. They’re perfect for bite-sized treats.
These homemade Chocolate Peanut Butter Cups are one of those recipes that feel a little special but are surprisingly easy to make. Once you try them, it’s hard to go back to anything store-bought.
