
A Sweet Taste of Nostalgia – The Story Behind Chocolate Cake Donuts
Chocolate cake donuts have a special place in my heart. There’s something comforting about the combination of tender, cocoa-flavored cake and glossy chocolate glaze that takes me straight back to my childhood mornings. I remember weekends when my kitchen smelled of warm chocolate, the aroma wrapping the whole house in a cozy, almost magical way. Unlike store-bought donuts, these are soft, slightly chewy in all the right places, and melt in your mouth with every bite.
Making chocolate cake donuts at home is also a form of creative therapy for me. Measuring, mixing, watching the batter rise in the oven—it’s simple, but it gives a sense of accomplishment that you don’t get from pre-packaged sweets. The process itself is comforting: the whisking of wet ingredients, the gentle folding of cocoa into flour, the careful filling of donut molds. By the time you dip them in a glossy chocolate glaze, the anticipation is half the fun.
What You’ll Need to Make These Irresistible Donuts
This recipe relies on everyday pantry ingredients, making it accessible yet incredibly rewarding. Fresh, quality ingredients always make a difference—the cocoa powder should be rich and unsweetened, the butter or oil fresh, and the vanilla extract aromatic.
Ingredients:
- 1 cup all-purpose flour
- ¼ cup cocoa powder
- ½ cup sugar
- 1 tsp baking powder
- ¼ tsp baking soda
- ¼ tsp salt
- 1 egg
- ½ cup milk
- 2 tbsp melted butter or oil
- 1 tsp vanilla extract
Chocolate Glaze:
- 1 cup chocolate chips
- 2 tbsp butter
- 2 tbsp milk
- Sprinkles (optional)
Even though the list is simple, these ingredients transform into decadent, tender donuts that feel luxurious while remaining homey.
Preparing the Donut Batter – Getting the Texture Just Right
The key to soft, tender donuts is balancing the wet and dry ingredients. Start by preheating your oven to 180°C (350°F) and greasing your donut pan generously with butter or non-stick spray. If you skip greasing, the donuts may stick, which is always heartbreaking.
In a large mixing bowl, sift together the flour and cocoa powder. Add sugar, baking powder, baking soda, and salt. Sifting the cocoa helps prevent clumps, giving you a smooth, even batter.
In a separate bowl, whisk together the egg, milk, melted butter or oil, and vanilla extract. I like to use a fork or hand whisk to gently combine the ingredients. The mixture should be smooth, slightly frothy, and fragrant.
Next, gradually fold the wet mixture into the dry ingredients. I usually add the wet ingredients in two parts, gently folding after each addition. This prevents overmixing, which can make the donuts dense. The batter should be thick but pourable, with a glossy chocolate sheen. A few tiny lumps are okay—they won’t affect the final texture and actually make the donuts more tender.
Filling and Baking – Creating Perfect Donut Shapes
Filling the donut molds can be tricky if your batter is too thick. I find using a piping bag or a zip-top bag with the tip snipped off works best for even, clean shapes. Fill each mold about three-quarters full. Don’t overfill; the donuts will puff up and could overflow.
Place the pan in the preheated oven and bake for 10–12 minutes. You’ll notice the aroma of cocoa and vanilla intensifying—this is the moment when anticipation peaks. Test doneness with a toothpick; it should come out clean or with just a few moist crumbs. The tops should spring back gently when touched.
After baking, allow the donuts to cool in the pan for 5 minutes, then transfer them carefully to a wire rack. Cooling completely is essential before glazing, otherwise the chocolate will melt unevenly or slide off. I like to peek at them as they cool—they look perfectly round, slightly puffed, and irresistible even without glaze.
Preparing the Chocolate Glaze – Glossy, Sweet, and Perfect
The chocolate glaze is where these donuts transform from good to spectacular. In a small saucepan over low heat, melt the chocolate chips with butter and milk. Stir constantly to prevent burning. The mixture should be smooth, thick, and glossy, with a silky texture that looks like liquid chocolate silk.
If the glaze is too thick for dipping, add milk one teaspoon at a time until it reaches a pourable consistency. The aroma of chocolate and butter is heavenly; it fills the kitchen and makes it impossible to wait for the donuts to cool completely.
Dipping and Decorating – Making Them Look as Good as They Taste
Once cooled, dip the tops of the donuts into the chocolate glaze. Hold each donut for a few seconds to allow excess glaze to drip back into the bowl. I like to rotate the donuts slightly to coat the edges as well, giving them a professional, even look.
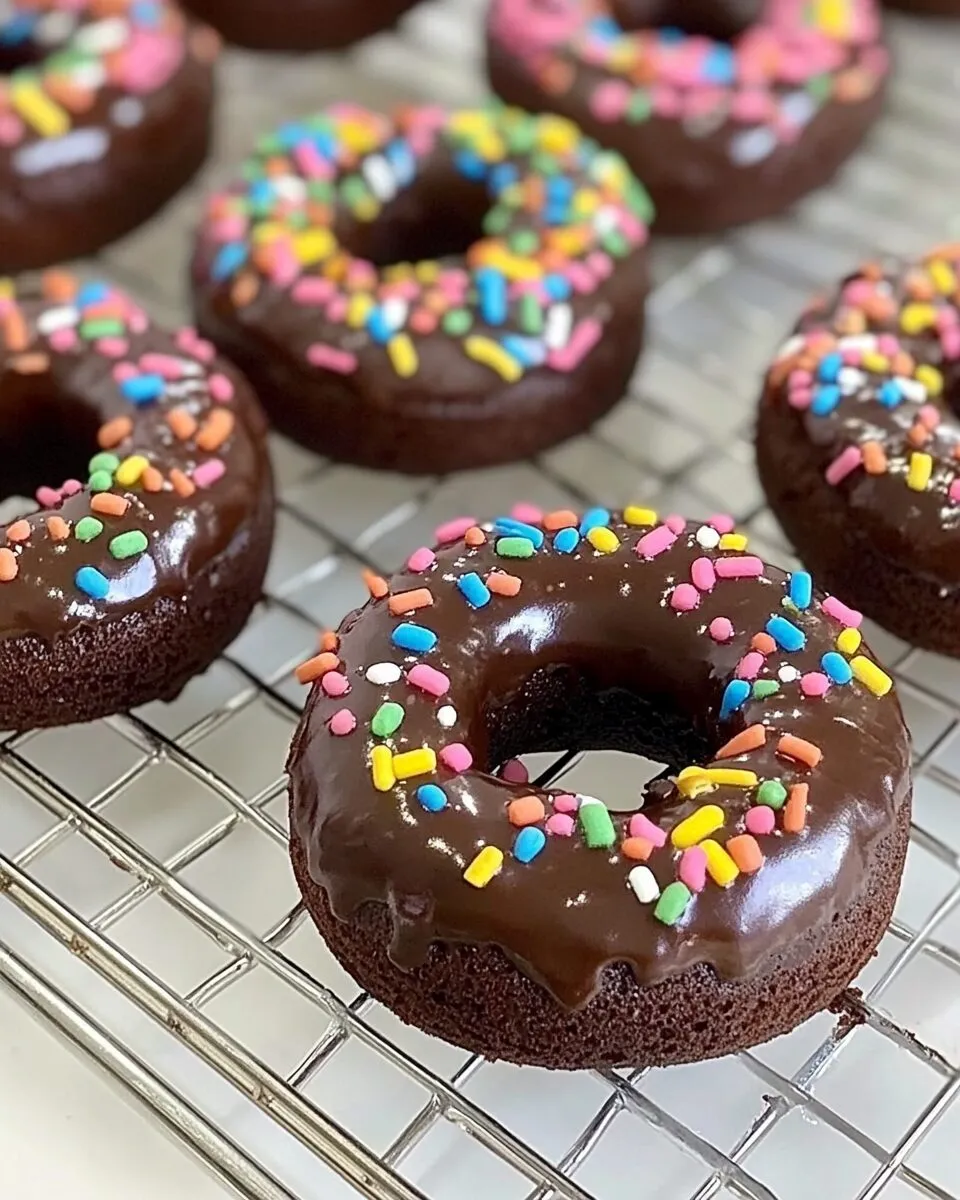
If you want to add sprinkles, do it immediately after dipping while the glaze is still wet. They stick perfectly and add a playful pop of color. Let the glaze set at room temperature for 15–20 minutes. If you’re impatient (like me), a few minutes in the fridge works too, but avoid stacking them until fully set.
Tips for Moist, Tender Chocolate Donuts
- Don’t overmix the batter; gentle folding keeps the crumb soft.
- Use fresh cocoa powder for richer flavor.
- Make sure the baking powder and baking soda are fresh; expired leavening can cause dense, flat donuts.
- Cool donuts completely before glazing; warm donuts will melt the chocolate unevenly.
- Adjust the glaze consistency carefully; too thin and it runs off, too thick and it’s difficult to coat.
Following these tips ensures each donut comes out soft, moist, and beautifully coated with chocolate.
Serving and Storing Your Homemade Chocolate Donuts
Chocolate cake donuts are best enjoyed fresh, preferably within the same day. Serve them with a hot cup of coffee, a glass of milk, or even a light dessert wine for an indulgent experience.
For storage, place the donuts in an airtight container at room temperature for 1–2 days. If your kitchen is warm, storing them in the fridge is fine, but bring them back to room temperature before serving for the best texture. Avoid stacking donuts before the glaze is fully set to prevent sticking.
Creative Ways to Serve Chocolate Cake Donuts
These donuts aren’t just breakfast treats—they’re versatile for all occasions. Try slicing them horizontally and filling with whipped cream or frosting for a donut sandwich. Crumble over ice cream or pudding for texture and chocolate flavor. Mini donuts make fun party favors or dessert platters. Decorate seasonally with colored sprinkles, edible glitter, or drizzle contrasting white chocolate for special events.
Variations to Try – From Peanut Butter Swirls to Spiced Chocolate
Once you’ve perfected the base chocolate donut, the possibilities are endless. Swirl in peanut butter or Nutella before baking for a rich, gooey twist. Add spices like cinnamon, espresso powder, or a touch of chili for warmth and depth. Fold in mini chocolate chips, nuts, or dried fruit to make each batch unique. You can even experiment with alternative glazes such as caramel, white chocolate, or flavored ganache to keep your creations exciting.
Nutrition Snapshot – A Sweet Indulgence to Savor
Homemade chocolate cake donuts may feel indulgent, but making them yourself gives control over ingredients. You’re using fresh eggs, cocoa, and milk without preservatives or artificial additives. One donut is rich and satisfying—perfect for a treat without overdoing it. Sharing them amplifies the experience, turning dessert into a social, joyful moment.
Sweet Questions Answered – Your Chocolate Donut FAQ Corner
Can I use whole wheat flour? Yes, though donuts will be slightly denser. Mixing half all-purpose with half whole wheat is a good compromise.
Can I bake these in a muffin pan instead? Absolutely, but add a few minutes to the baking time. Muffins may rise differently than donuts.
Why did my glaze separate? Chocolate may overheat or milk added too quickly. Melt gently and stir constantly.
Can I make these ahead of time? Bake ahead, but glaze just before serving to maintain shine and freshness.
Are these donuts freezer-friendly? Yes, freeze baked, cooled donuts without glaze for up to a month. Glaze after thawing for best results.
Making chocolate cake donuts with chocolate glaze is a joyful, rewarding baking experience. From mixing to dipping, every step fills your kitchen with incredible aromas and anticipation. One bite of that tender, chocolatey cake with rich, glossy glaze and you’ll understand why homemade donuts are so much more satisfying than anything store-bought.
